Ad placeholder
Trap: Difference between revisions
| (17 intermediate revisions by 2 users not shown) | |||
| Line 1: | Line 1: | ||
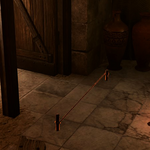
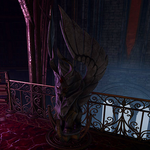
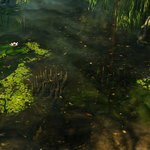
[[File:PoisonTrap.png|thumb|150px|Triggered trap Vent with toxin spilled around]] | |||
[[File: | |||
A '''trap''' is a hidden danger that can cause sudden unwanted [[conditions]] and/or damage. | A '''trap''' is a hidden danger that can cause sudden unwanted [[conditions]] and/or damage. | ||
| Line 9: | Line 8: | ||
* [[Tripwire]]s | * [[Tripwire]]s | ||
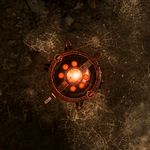
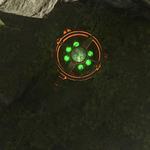
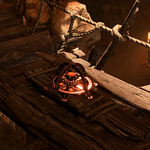
* [[Blast Mine]]s (three kinds, causing {{DamageText||Fire}} or {{DamageText||Fire}} + {{DamageText||Poison}} damage) | * [[Blast Mine]]s (three kinds, causing {{DamageText||Fire}} or {{DamageText||Fire}} + {{DamageText||Poison}} damage) | ||
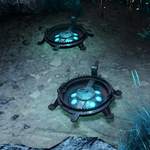
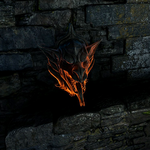
* [[Vent]]s (various kinds spewing hot steam, [[Noxious Fumes|toxic gas]], spilling around [[Simple Toxin]] or [[ | * [[Vent]]s (various kinds spewing hot steam, [[Noxious Fumes|toxic gas]], spilling around [[Simple Toxin|toxic liquid]] or [[Grease (surface)|grease]], or activating AoE spells like {{SAI|Cloudkill}} in their vicinity) | ||
* Gargoyle Statues/Gargoyle Heads (firing Fire Bolts/Ice Bolts with certain frequency) | * Gargoyle Statues/Gargoyle Heads (firing Fire Bolts/Ice Bolts with certain frequency) | ||
| Line 24: | Line 23: | ||
File:MarblePlate.png|An example of Marble Plate trap trigger. | File:MarblePlate.png|An example of Marble Plate trap trigger. | ||
</gallery> | </gallery> | ||
== Locations of Traps == | |||
Apart from that, there are multiple locations within the game featuring unique types of traps that do not appear anywhere else. These traps might inflict unique conditions as a result of failed save against them, and sometimes are themselves vulnerable only for a certain type of damage, being resistant to all other. Still, they can be disarmed just like all other traps within the game. | |||
''In [[Act One]] locations:'' | ''In [[Act One]] locations:'' | ||
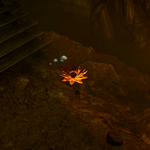
* [[Sunlit Wetlands]]/[[Putrid Bog]]: [[Sunlit_Wetlands#Spike_traps|Spike Traps]] under the water, [[Peculiar Flower]]s and Gas Vents with [[Noxious Fumes]] in the Overgrown Tunnel | * [[Sunlit Wetlands]]/[[Putrid Bog]]: [[Sunlit_Wetlands#Spike_traps|Spike Traps]] under the water, [[Peculiar Flower]]s and Gas Vents with [[Noxious Fumes]] in the Overgrown Tunnel | ||
| Line 35: | Line 35: | ||
* [[Dawnbreaker]]s in the Secret Chamber of the [[Crèche Y'llek]] | * [[Dawnbreaker]]s in the Secret Chamber of the [[Crèche Y'llek]] | ||
* Statues right behind the portcullis at the [[Selûnite Outpost]] in the Underdark issue radiant blasts at anything approaching the portcullis as long as powered by Moonstone inside the outpost | * Statues right behind the portcullis at the [[Selûnite Outpost]] in the Underdark issue radiant blasts at anything approaching the portcullis as long as powered by Moonstone inside the outpost | ||
* [[Arcane Turret]]s in the [[Arcane Tower]] in the Underdark <br> | * [[Arcane Turret]]s in the [[Arcane Tower]] in the Underdark | ||
* [[Trapped Beacon]]s in [[Grymforge]], on a gallery available after finishing the side-quest {{Quest|Get Past the Rubble}} <br> | |||
''In [[Act Two]] locations:'' | ''In [[Act Two]] locations:'' | ||
* [[Gauntlet of Shar]]: Vents in the | * [[Gauntlet of Shar]]: Vents in the antechamber produce [[Void]] - an area similar to {{SAI|Hunger of Hadar}} effect, except for acid damage, while vents in the [[Silent Library]] form a surface similar to {{SAI|Evard's Black Tentacles}} <br> | ||
''In [[Act Three]] locations:'' | ''In [[Act Three]] locations:'' | ||
* [[Rivington]]: Vents near the entrance to the Smugglers' Cave issuing hot steam (which conceals Blast Mines planted in the ground). | * [[Rivington]]: Vents near the entrance to the Smugglers' Cave issuing hot steam (which conceals Blast Mines planted in the ground). | ||
* [[Blushing Mermaid]]: Peculiar Flowers and Gas Vents in the [[The_Blushing_Mermaid_-_Basement|Ethel's Lair]] beneath the tavern. Also, the entrance door is trapped with {{SAI|Vicious Mockery}} spell. | * [[Blushing Mermaid]]: Peculiar Flowers and Gas Vents in the [[The_Blushing_Mermaid_-_Basement|Ethel's Lair]] beneath the tavern. Also, the entrance door is trapped with {{SAI|Vicious Mockery}} spell. | ||
* [[Ramazith's Tower]]: [[Arcane Turret]]s, Gas Vents with {{SAI|Cloudkill}}, and [[ | * [[Counting House]]: [[Teleporting Trap]]s inside the Vaults section and [[Alarm Machines]] inside the building and on berths at the [[The_Counting_House#Counting_House_docks|docks]] | ||
* [[Ramazith's Tower]]: [[Arcane Turret]]s, Gas Vents with {{SAI|Cloudkill}}, and a pair of statues named [[Aspect of Athkatla]] at the bottom floor, accessible by the Weave Button. | |||
* [[Wyrm's Rock Fortress]]: Various mechanisms installed within by [[Enver Gortash]]: [[Grenade Impeller]]s and [[Incineration Caster]]s, and [[Stunner Vent]]s on the rooftop. | * [[Wyrm's Rock Fortress]]: Various mechanisms installed within by [[Enver Gortash]]: [[Grenade Impeller]]s and [[Incineration Caster]]s, and [[Stunner Vent]]s on the rooftop. | ||
* [[Undercity Ruins]]/[[Bhaal Temple]]: [[Sanguine Vent]]s on the bridge leading to the temple itself issue puddles of [[Unstable Blood]], blazing if ignited <br> | * [[Undercity Ruins]]/[[Bhaal Temple]]: [[Sanguine Vent]]s on the bridge leading to the temple itself issue puddles of [[Unstable Blood]], blazing if ignited <br> | ||
=== Gallery === | |||
<gallery heights="150px" widths="150px" mode="nolines" class="center" perrow="6" style="margin:0 auto;"> | <gallery heights="150px" widths="150px" mode="nolines" class="center" perrow="6" style="margin:0 auto;"> | ||
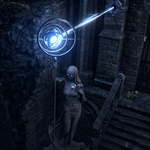
File:ArcaneBarrier.png| | File:ArcaneBarrier.png|Aspect of Athkatla (Ramazith's Tower). | ||
File:Dawnbreaker.png|Dawnbreaker (Crèche Y'llek). | File:Dawnbreaker.png|Dawnbreaker (Crèche Y'llek). | ||
File:GithTeleportTrap.png| | File:GithTeleportTrap.png|Teleporting Trap in the Hatchery (Crèche Y'llek). | ||
File:RepulsionMine.png|Repulsion Mine (Rosymorn Monastery Trail). | File:RepulsionMine.png|Repulsion Mine (Rosymorn Monastery Trail). | ||
File:SeluniteStatue.png|Statue in the Underdark (Selûnite Outpost). | File:SeluniteStatue.png|Statue in the Underdark (Selûnite Outpost). | ||
| Line 57: | Line 59: | ||
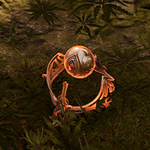
File:ProximityExplosive.png|Proximity-sensitive bombs (Zhentarim Hideout). | File:ProximityExplosive.png|Proximity-sensitive bombs (Zhentarim Hideout). | ||
</gallery> | </gallery> | ||
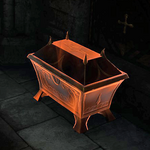
Besides, some objects within the game might be guarded by a spell (apart from other measures of safety, f.e. a physical lock) and therefore recognized by party members as "trapped". Most often these are containers that store various items, either valuable or crucial for whatever quest. In some cases, triggering the trapped container without disarming it first may destroy it along with the precious item inside. Also, a trapped object might block the way to the target item or to the quest checkpoint. | Besides, some objects within the game might be guarded by a spell (apart from other measures of safety, f.e. a physical lock) and therefore recognized by party members as "trapped". Most often these are containers that store various items, either valuable or crucial for whatever quest. In some cases, triggering the trapped container without disarming it first may destroy it along with the precious item inside. Also, a trapped object might block the way to the target item or to the quest checkpoint. | ||
| Line 63: | Line 64: | ||
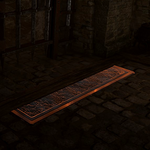
Traps can be placed independently from one another or be combined in a system, when all elements might be triggered simultaneously after interacting with some detail of the environment, most commonly, stepping on a [[Marble Plate]]. In that case, a trigger item is recognized by characters as a trap, too, and Disaming it renders the whole system inactive. | Traps can be placed independently from one another or be combined in a system, when all elements might be triggered simultaneously after interacting with some detail of the environment, most commonly, stepping on a [[Marble Plate]]. In that case, a trigger item is recognized by characters as a trap, too, and Disaming it renders the whole system inactive. | ||
The only type of a Trap available to be set by the | The only type of a Trap available to be set by the party members is a {{SAI|Glyph of Warding}} spell. | ||
== Involvement == | == Involvement == | ||
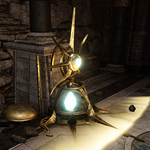
[[File:TrapsDisarmed.png|thumb|150px|Pieces of disarmed traps]] | [[File:TrapsDisarmed.png|thumb|150px|Pieces of disarmed traps]] | ||
The | The {{Skill|Perception}} skill is used to detect traps. This is a passive skill check performed whenever a party member comes close enough to an active, yet undetected, trap. Each party member makes a check independently, so if the check was failed by one party member, there is a chance that another one is more lucky and successfully spot a trap. | ||
To disarm a trap the | To disarm a trap the interacting party member needs to use their {{Skill|Sleight of Hand}} skill (requires a dice roll) along with a {{SmRarityItem|Trap Disarm Toolkit}}. If the roll was successful, the trap is disarmed (which is often visualized as bursting into further-inactive pieces), and the Trap Disarm Toolkit '''is not spent'''. On failed or botched roll, the Trap Disarm Toolkit '''is spent''', and the trap triggers. | ||
Unlike [[Lockpick|Lockpicking]], disarming a trap cannot be rerolled by | Unlike [[Lockpick|Lockpicking]], disarming a trap cannot be rerolled by spending another Trap Disarm Toolkit. Failed and botched rolls, though, can be rerolled using [[File:Inspiration Icon.png|24px|link=]][[Inspiration]] points, like most other roll-based checks within the game. | ||
Some traps can be inactivated by certain means provided by the game plot, or | Some traps can be inactivated by certain means provided by the game plot, or destroyed physically by weapons' or magic attacks. | ||
Gas [[Vent]]s can also be disabled by placing/throwing a heavy enough object on-top of them (to do this, the vent should first be successfully detected). | Gas [[Vent]]s can also be disabled by placing/throwing a heavy enough object on-top of them (to do this, the vent should first be successfully detected). | ||
Latest revision as of 09:49, 7 February 2025

A trap is a hidden danger that can cause sudden unwanted conditions and/or damage.

“A trap. Let us send forth our least favourite, to be sure.„
Types of Traps[edit | edit source]
Most common types of traps that might be encountered in the game are:
- Tripwires
- Blast Mines (three kinds, causing
 Fire or Fire +
  Poison damage)
 - Vents (various kinds spewing hot steam, toxic gas, spilling around toxic liquid or grease, or activating AoE spells like
 in their vicinity)
 - Gargoyle Statues/Gargoyle Heads (firing Fire Bolts/Ice Bolts with certain frequency)
Gallery[edit | edit source]
Tripwire trap (armed).
Blast Mine (fire damage).
Blast Mine (fire damage + poison damage).
Blast Mine (explosion).

Trapped Gargoyle Statue.
Gargoyle Head on the wall.
Gas Vent issuing Noxious Fumes.
An example of trapped object.
An example of Marble Plate trap trigger.


Locations of Traps[edit | edit source]
Apart from that, there are multiple locations within the game featuring unique types of traps that do not appear anywhere else. These traps might inflict unique conditions as a result of failed save against them, and sometimes are themselves vulnerable only for a certain type of damage, being resistant to all other. Still, they can be disarmed just like all other traps within the game.
In Act One locations:
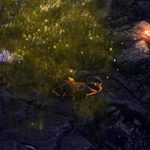
- Sunlit Wetlands/Putrid Bog: Spike Traps under the water, Peculiar Flowers and Gas Vents with Noxious Fumes in the Overgrown Tunnel
- Risen Road: Boulder Trap in the cave near the Toll House
- Waukeen's Rest: Proximity Explosives and Granitic Rocks in the Zhentarim Hideout.
- Repulsion Mines on the cliffs in the Rosymorn Monastery Trail and in the Hatchery of the Crèche Y'llek
- Teleporting Traps and Gas Pits emitting Strange Gas in the Hatchery of the Crèche Y'llek
- Dawnbreakers in the Secret Chamber of the Crèche Y'llek
- Statues right behind the portcullis at the Selûnite Outpost in the Underdark issue radiant blasts at anything approaching the portcullis as long as powered by Moonstone inside the outpost
- Arcane Turrets in the Arcane Tower in the Underdark
- Trapped Beacons in Grymforge, on a gallery available after finishing the side-quest

In Act Two locations:
- Gauntlet of Shar: Vents in the antechamber produce Void - an area similar to
 effect, except for acid damage, while vents in the Silent Library form a surface similar to
In Act Three locations:
- Rivington: Vents near the entrance to the Smugglers' Cave issuing hot steam (which conceals Blast Mines planted in the ground).
- Blushing Mermaid: Peculiar Flowers and Gas Vents in the Ethel's Lair beneath the tavern. Also, the entrance door is trapped with
 spell.
 - Counting House: Teleporting Traps inside the Vaults section and Alarm Machines inside the building and on berths at the docks
- Ramazith's Tower: Arcane Turrets, Gas Vents with , and a pair of statues named Aspect of Athkatla at the bottom floor, accessible by the Weave Button.
- Wyrm's Rock Fortress: Various mechanisms installed within by Enver Gortash: Grenade Impellers and Incineration Casters, and Stunner Vents on the rooftop.
- Undercity Ruins/Bhaal Temple: Sanguine Vents on the bridge leading to the temple itself issue puddles of Unstable Blood, blazing if ignited
Gallery[edit | edit source]
Aspect of Athkatla (Ramazith's Tower).
Dawnbreaker (Crèche Y'llek).
Teleporting Trap in the Hatchery (Crèche Y'llek).
Repulsion Mine (Rosymorn Monastery Trail).
Statue in the Underdark (Selûnite Outpost).
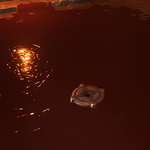
Vent with Unstable Blood (Undercity Ruins).
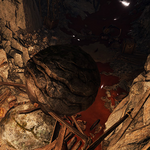
Boulder Trap (cave near the Risen Road).
Peculiar Flower (Blushing Mermaid Basement).
Spike Traps under the water (Sunlit Wetlands).
Proximity-sensitive bombs (Zhentarim Hideout).


Besides, some objects within the game might be guarded by a spell (apart from other measures of safety, f.e. a physical lock) and therefore recognized by party members as "trapped". Most often these are containers that store various items, either valuable or crucial for whatever quest. In some cases, triggering the trapped container without disarming it first may destroy it along with the precious item inside. Also, a trapped object might block the way to the target item or to the quest checkpoint.
Traps can be placed independently from one another or be combined in a system, when all elements might be triggered simultaneously after interacting with some detail of the environment, most commonly, stepping on a Marble Plate. In that case, a trigger item is recognized by characters as a trap, too, and Disaming it renders the whole system inactive.
The only type of a Trap available to be set by the party members is a ![]() spell.
spell.
Involvement[edit | edit source]

The ![]() skill is used to detect traps. This is a passive skill check performed whenever a party member comes close enough to an active, yet undetected, trap. Each party member makes a check independently, so if the check was failed by one party member, there is a chance that another one is more lucky and successfully spot a trap.
skill is used to detect traps. This is a passive skill check performed whenever a party member comes close enough to an active, yet undetected, trap. Each party member makes a check independently, so if the check was failed by one party member, there is a chance that another one is more lucky and successfully spot a trap.
To disarm a trap the interacting party member needs to use their ![]() skill (requires a dice roll) along with a
skill (requires a dice roll) along with a ![]() Trap Disarm Toolkit. If the roll was successful, the trap is disarmed (which is often visualized as bursting into further-inactive pieces), and the Trap Disarm Toolkit is not spent. On failed or botched roll, the Trap Disarm Toolkit is spent, and the trap triggers.
Trap Disarm Toolkit. If the roll was successful, the trap is disarmed (which is often visualized as bursting into further-inactive pieces), and the Trap Disarm Toolkit is not spent. On failed or botched roll, the Trap Disarm Toolkit is spent, and the trap triggers.
Unlike Lockpicking, disarming a trap cannot be rerolled by spending another Trap Disarm Toolkit. Failed and botched rolls, though, can be rerolled using ![]() Inspiration points, like most other roll-based checks within the game.
Inspiration points, like most other roll-based checks within the game.
Some traps can be inactivated by certain means provided by the game plot, or destroyed physically by weapons' or magic attacks. Gas Vents can also be disabled by placing/throwing a heavy enough object on-top of them (to do this, the vent should first be successfully detected).
Some traps might be visible without a Perception check, but unless a character detects them they cannot be disarmed and can only be avoided.
Gameplay | |||||||||||||||||
|---|---|---|---|---|---|---|---|---|---|---|---|---|---|---|---|---|---|
| |||||||||||||||||
| |||||||||||||||||
| |||||||||||||||||