Ad placeholder
Nere: Difference between revisions
(Removed XP notes) |
|||
| (54 intermediate revisions by 12 users not shown) | |||
| Line 4: | Line 4: | ||
}} | }} | ||
{{Infobox creature | {{Infobox creature | ||
| name = Nere | | name = Nere | ||
| | | identity = Male | ||
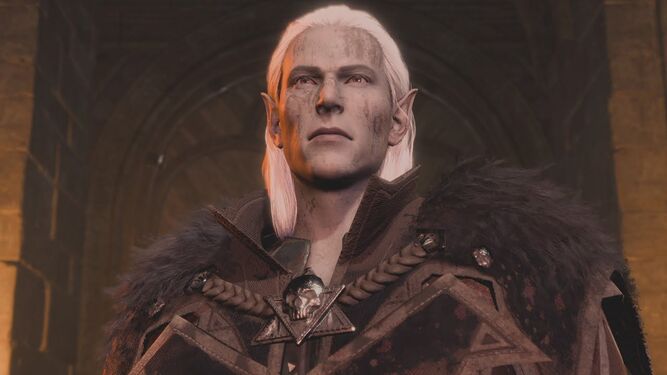
| image = <gallery> | |||
Nere-face.jpg|In-game | |||
Portrait Nere.png|Portrait | |||
</gallery> | |||
| title = True Soul of the Absolute | | title = True Soul of the Absolute | ||
| va = | | va = Joseph Capp | ||
| | | race = [[Drow]] | ||
| size = Medium | | subrace = [[Lolth-Sworn Drow]] | ||
| type = Humanoid | | size = [[Medium]] | ||
| type = [[Humanoid]] | |||
| ac = 12 | | ac = 12 | ||
| e hp = 54 | | e hp = 54 | ||
| Line 20: | Line 23: | ||
| weight kg = 60 | | weight kg = 60 | ||
| level = 5 | | level = 5 | ||
| xp = 90 | |||
| str = 17 | | str = 17 | ||
| dex = 15 | | dex = 15 | ||
| Line 30: | Line 34: | ||
| h conditions = Legendary Action: Psionic Visage | | h conditions = Legendary Action: Psionic Visage | ||
| resistances = psychic resistant full | | resistances = psychic resistant full | ||
| passives = Darkvision, | | passives = Darkvision, Extra Attack, Fey Ancestry, Muscular, Opportunity Attack, Sunlight Sensitivity | ||
| h passives = Darkvision, | | h passives = Darkvision, Extra Attack, Fey Ancestry, Legendary Action: Psionic Visage, Muscular, Opportunity Attack, Sunlight Sensitivity | ||
| uid = S_UND_TheDrowNere | |||
| uuid = 06bf05c5-216b-4eaf-91f5-8f1dd3d57f30 | |||
| stats = UND_Nere | |||
| uid2 = UNI_UND_TheDrowNere_Headless | |||
| uuid2 = 8f0dd6a9-cf20-4e92-94b1-39da14ccbabb | |||
| stats2 = UND_Nere | |||
| uid3 = S_SHA_Necromancer_NereZombie | |||
| uuid3 = 7e0ee67a-d2a4-48d2-bca0-a9ae373f4f75 | |||
| stats3 = SHA_Ghoul_Medic | |||
}} | }} | ||
'''Nere''', also known as '''True Soul Nere''', is a [[True Soul]] of the [[ | '''Nere''', also known as '''True Soul Nere''', is a [[Absolute#True Souls|True Soul]] of the [[Absolute#Followers of the Absolute|Absolute]], and potential boss in ''[[Baldur's Gate 3]]''. In [[Act One]], he can be found at [[Grymforge]], trapped inside a room that suffered a cave-in. He is a pivotal character for the quests {{Quest|Free True Soul Nere}} and {{Quest|Deliver Nere's Head}}. | ||
{{DiQ|Heretics. Let Nere be your end.|Nere}} | |||
== Involvement == | == Involvement == | ||
=== Act One === | === Act One === | ||
A group of enslaved [[Gnome| | {{Main|Free True Soul Nere}} | ||
A group of enslaved [[Gnome|Deep Gnomes]] are trying to free Nere from a cave-in near the main room of the [[Grymforge]]. To save him, the gnomes tell the party to find {{CharLink|Philomeen}}, a runaway gnome in possession of an explosive capable of destroying the rubble. | |||
'' | ''Caution'': Nere dies if [[Waypoint|fast travelling]] or [[long rest|long resting]] more than once after first communing with him at the cave-in. | ||
After freeing him, the party can | After freeing him, the party can fight Nere and his mercenaries to save the gnome slaves. The party can also complete the quest {{Quest|Blind the Absolute}} - convincing {{CharLink|Brithvar|Elder Brithvar}} to side against Nere. | ||
Alternatively, it | Alternatively, it is possible to betray Brithvar and convince Nere and the Absolute Cultists to turn on the mercenaries. | ||
It is also possible to lock the party out of either of these options through dialogue choices prior to rescuing Nere, leading him to kill both the gnome slaves and | It is also possible to lock the party out of either of these options through dialogue choices prior to rescuing Nere, leading him to kill both the gnome slaves and {{CharLink|Elenna Thrinn|Sergeant Thrinn}} immediately after he is freed from the rubble. He then demands that the party help him to kill the rest of the cultists and duergar mercenaries; this turns all characters except Nere hostile and starts combat. | ||
If | If defying Nere when he kills the gnome slaves (or when he demands to kill the other cultists, and not having a deal with Elder Brithvar), a fight starts against Nere and all the duergar at the same time. However, if having a deal with Elder Brithvar, it is possible to interrupt Nere from killing the gnome slaves and still side with him once Elder Brithvar attacks Nere, leading to an option of saving the gnomes while Nere is still alive. | ||
Deciding to fight Nere's mercenaries before freeing him unlocks a dialogue option to convince him that the [[Absolute]] is little more than a group of cultists. This results in Nere abandoning the Cult of the Absolute and leaving Grymforge for good. | |||
If | If defeated (or dying off-screen from a revolt or poisoning), it is then possible to remove Nere's head and deliver it to {{CharLink|Spaw}} or {{CharLink|Glut}}, completing the quest {{Quest|Deliver Nere's Head}}. | ||
Regardless of his status, the party | Regardless of his status, the party receives a {{SmRarityItem|Broken Moonlantern}}, a precursor to a crucial item needed to travel through the [[Shadow-Cursed Lands]] to reach [[Moonrise Towers]]. There is no way to fix this lantern, but the there are several options to find a working one later. | ||
=== Act Two === | === Act Two === | ||
If | If kept alive in Grymforge and remaining loyal to the Absolute, Nere appears briefly in Act Two as a zombie servant to {{CharLink|Balthazar}}. | ||
== Speak with Dead == | |||
Nere can be spoken to with {{SAI|Speak with Dead}}. | |||
{{Dialogue start}} | |||
'''Party member:''' Who are you? | |||
* '''Nere:''' True Soul... Nere... | |||
'''Party member:''' How did you get trapped? | |||
* '''Nere:''' Corridor... triggered old trap... cave-in... | |||
'''Party member:''' What were you doing here? | |||
* '''Nere:''' Find... path to temple... orders of {{CharLink|Ketheric Thorm|General}}... | |||
** Party member: What about this temple is so important? | |||
*** '''Nere:''' General's necromancer... {{CharLink|Balthazar}}... | |||
** Party member: Tell me more about this General. | |||
*** '''Nere:''' Absolute's Chosen... Moonrise Towers... | |||
'''Party member:''' Where did you come from? | |||
* | * '''Nere:''' Moonrise... Towers... | ||
* | ** Party member: How can I get to Moonrise Towers? | ||
*** '''Nere:''' {{CharLink|Minthara}} in goblin camp... safe passage... Moonlantern... drider... | |||
'''Party member:''' Did you come here with the duergar? | |||
* '''Nere:''' Mercenaries... Absolute unites... | |||
{{Dialogue end}} | |||
== Combat == | == Combat == | ||
=== | === Attacks and abilities === | ||
{{Feature box|Dissonant Whispers}} | |||
{{Feature box|Main Hand Attack|item=Sword of Screams}} | |||
{{Feature box|Shield of Screams}} | {{Feature box|Shield of Screams}} | ||
{{Feature box|Wicked Coercion}} | |||
====Honour mode==== | |||
{{Feature box|Psionic Visage}} | |||
{{Feature box|Shatter Visage}} | |||
{{ | ===Allies=== | ||
{{div col}} | |||
* {{MdCharLink|Dalthar}} | |||
* {{MdCharLink|Drar}} | |||
* {{MdCharLink|Dunnol}} | |||
* {{MdCharLink|Fonmara}} | |||
* {{MdCharLink|Greymon}} | |||
* {{MdCharLink|Murmath|Murmath}}* | |||
** {{MdCharLink|Lur Fu}}* (conditional) | |||
** {{MdCharLink|Lur Jox}}* (conditional) | |||
** {{MdCharLink|Lur Otan}}* (conditional) | |||
** {{MdCharLink|Lur Xanta}}* (conditional) | |||
* {{MdCharLink|Elenna Thrinn|Thrinn}} | |||
{{div col end}} | |||
If not completing {{Quest|Blind the Absolute}}, then additional allies will side with Nere: | |||
{{div col}} | |||
* {{MdCharLink|Brithvar}} | |||
* {{MdCharLink|Danna}}* | |||
* {{MdCharLink|Gergerann}}* | |||
* {{MdCharLink|Grundril}}* | |||
* {{MdCharLink|Kith}}* | |||
* {{MdCharLink|Kur}}* | |||
* {{MdCharLink|Magmar}}* | |||
* {{MdCharLink|Mirthis}}* | |||
* {{MdCharLink|Morghal}}* | |||
* {{MdCharLink|Morgya}}* | |||
* {{MdCharLink|Pistle}}* | |||
* {{MdCharLink|Orgarth}}* | |||
* {{MdCharLink|Thudd}} | |||
* {{MdCharLink|Scrying Eye}} | |||
* {{MdCharLink|Skarjall}}* | |||
{{div col end}} | |||
{{em|'''*'''}} = Does not join the fight until it gets close to them | |||
{{ | === Encounter details === | ||
If the party completed {{Quest|Blind the Absolute}} then many duergar choose to ally with them against Nere, significantly reducing the difficulty of the fight. | |||
Multiple enemies have spells that can control the minds of party members. Nere uses {{SAI|Wicked Coercion}}, and both [[Dunnol|Mind Master Dunnol]] and [[Fonmara|Mind Master Fonmara]] use {{SAI|Mind Mastery}}, forcing the party to waste actions fighting each other. | |||
{{ | |||
{{ | This battle also occurs next to {{Area|Lava}} which will quickly {{Cond|Melting|melt}} anyone who falls into it. Many enemies have ways of pushing party backwards into the lava, such as {{SAI|Shove}}, Thrinn's {{SAI|Thunderwave}}, or Nere's {{SAI|Shatter Visage}} on Honour mode. Nere has an abnormally high {{Skill|Athletics}} bonus of +9 and the {{SAI|Muscular}} passive, making it very difficult to shove him (DC 24), though he does not actually possess the Shove ability himself. | ||
=== Tactics === | === Tactics === | ||
It is most important to take out the enemies that can mind control party members first. | |||
It is advisable to keep away from the lava as well, as it almost certainly kills anyone who falls inside. However, this can be used to the party's advantage by knocking enemies in, using effects such as {{SAI|Shove}}, {{SAI|Pushing Attack (Melee)}}, {{SAI|Flurry of Blows: Push}}, {{SAI|Thunderwave}}, or {{SmRarityItem|Arrow of Roaring Thunder}}. | |||
Proximity to a {{SmRarityItem|Sussur Bloom}} greatly reduces the amount of magic used, thanks to its [[Sussur Flower Antimagic Field (Condition)|Sussur Flower Antimagic Field]]. This is particularly effective against Nere since his spells are far more dangerous than his physical attacks. Failing that, he can be attacked with a Sussur {{SmRarityItem|Sussur Greatsword|Greatsword}}, {{SmRarityItem|Sussur Sickle|Sickle}}, or {{SmRarityItem|Sussur Dagger|Dagger}} to {{Cond|Silenced|Silence}} him. | |||
In Honor Mode Nere's legendary action, whilst stating it triggers when attacked, instead triggers on many offensive actions which do not require an attack roll. Even spells which do no damage and require no save, such as {{SAI|Create Water|Create Water}} trigger it. {{Cond|Silenced|Silencing}} him does not impact his ability to trigger this action; {{Cond|Incapacitated|Incapacitation}} him prevents him from using it. | |||
Also, while {{SAI|Psionic Visage|Psionic Visages}} are active, the {{SAI|Shatter Visage|Detonations}} triggered by attacking Nere are centered on the character who triggered the {{SAI|Shatter Visage|Detonation}}, rather than Nere. | |||
=== Loot === | === Loot === | ||
{{div col}} | {{div col}} | ||
* {{MdRarityItem|Gold|alias=1402 Gold}} | |||
* {{MdRarityItem|Amethyst Ring}} | |||
* {{MdRarityItem|Broken Moonlantern}} | |||
* {{MdRarityItem|Dagger +1}} | |||
* {{MdRarityItem|Disintegrating Night Walkers}} | |||
* {{MdRarityItem|Mind Flayer Parasite Specimen}} | * {{MdRarityItem|Mind Flayer Parasite Specimen}} | ||
* {{MdRarityItem|Nere's Head}} | * {{MdRarityItem|Nere's Head}} | ||
* {{MdRarityItem|Potion of Healing}} | * {{MdRarityItem|Potion of Healing}} | ||
* {{MdRarityItem|Silver necklace}} | * {{MdRarityItem|Silver necklace}} | ||
* {{MdRarityItem|Simple Robe}} | * {{MdRarityItem|Simple Robe}} | ||
* {{MdRarityItem|Spider's Lyre}} | * {{MdRarityItem|Spider's Lyre}} | ||
* {{MdRarityItem|Sword of Screams}} | |||
{{div col end}} | {{div col end}} | ||
It is possible to get both {{SmRarityItem|Gift from the Absolute}} and {{SmRarityItem|Mind Flayer Parasite Specimen}} by first completing {{Quest|Free True Soul Nere}} then killing Nere later. | |||
== Related quests == | |||
* {{Quest|Deliver Nere's Head}} | |||
* | * {{Quest|Find the Explosives}} | ||
* | * {{Quest|Free True Soul Nere}} | ||
* | * {{Quest|Save the Grymforge Gnomes}} | ||
== Gallery == | == Gallery == | ||
<gallery heights=" | <gallery heights="250px" mode="packed"> | ||
Nere_Model.png|Nere's model | |||
Nere-appearance.jpg|Nere in early access | Nere-appearance.jpg|Nere in early access | ||
</gallery> | </gallery> | ||
== External links == | == External links == | ||
| Line 145: | Line 199: | ||
{{Grymforge}} | {{Grymforge}} | ||
[[Category:Drow]] | [[Category:Drow]] | ||
[[Category:Lolth-Sworn Drow]] | |||
[[Category:Humanoids]] | [[Category:Humanoids]] | ||
[[Category:Characters]] | [[Category:Characters]] | ||
Latest revision as of 16:25, 30 January 2025

“Heretics. Let Nere be your end.„
Involvement[edit | edit source]
Act One[edit | edit source]
A group of enslaved Deep Gnomes are trying to free Nere from a cave-in near the main room of the Grymforge. To save him, the gnomes tell the party to find Philomeen, a runaway gnome in possession of an explosive capable of destroying the rubble.
Caution: Nere dies if fast travelling or long resting more than once after first communing with him at the cave-in.
After freeing him, the party can fight Nere and his mercenaries to save the gnome slaves. The party can also complete the quest ![]() - convincing Elder Brithvar to side against Nere.
- convincing Elder Brithvar to side against Nere.
Alternatively, it is possible to betray Brithvar and convince Nere and the Absolute Cultists to turn on the mercenaries.
It is also possible to lock the party out of either of these options through dialogue choices prior to rescuing Nere, leading him to kill both the gnome slaves and Sergeant Thrinn immediately after he is freed from the rubble. He then demands that the party help him to kill the rest of the cultists and duergar mercenaries; this turns all characters except Nere hostile and starts combat.
If defying Nere when he kills the gnome slaves (or when he demands to kill the other cultists, and not having a deal with Elder Brithvar), a fight starts against Nere and all the duergar at the same time. However, if having a deal with Elder Brithvar, it is possible to interrupt Nere from killing the gnome slaves and still side with him once Elder Brithvar attacks Nere, leading to an option of saving the gnomes while Nere is still alive.
Deciding to fight Nere's mercenaries before freeing him unlocks a dialogue option to convince him that the Absolute is little more than a group of cultists. This results in Nere abandoning the Cult of the Absolute and leaving Grymforge for good.
If defeated (or dying off-screen from a revolt or poisoning), it is then possible to remove Nere's head and deliver it to Spaw or Glut, completing the quest ![]() .
.
Regardless of his status, the party receives a ![]() Broken Moonlantern, a precursor to a crucial item needed to travel through the Shadow-Cursed Lands to reach Moonrise Towers. There is no way to fix this lantern, but the there are several options to find a working one later.
Broken Moonlantern, a precursor to a crucial item needed to travel through the Shadow-Cursed Lands to reach Moonrise Towers. There is no way to fix this lantern, but the there are several options to find a working one later.
Act Two[edit | edit source]
If kept alive in Grymforge and remaining loyal to the Absolute, Nere appears briefly in Act Two as a zombie servant to Balthazar.
Speak with Dead[edit | edit source]
Nere can be spoken to with ![]() .
.
Party member: Who are you?
- Nere: True Soul... Nere...
Party member: How did you get trapped?
- Nere: Corridor... triggered old trap... cave-in...
Party member: What were you doing here?
- Nere: Find... path to temple... orders of General...
- Party member: What about this temple is so important?
- Nere: General's necromancer... Balthazar...
- Party member: Tell me more about this General.
- Nere: Absolute's Chosen... Moonrise Towers...
- Party member: What about this temple is so important?
Party member: Where did you come from?
- Nere: Moonrise... Towers...
- Party member: How can I get to Moonrise Towers?
- Nere: Minthara in goblin camp... safe passage... Moonlantern... drider...
- Party member: How can I get to Moonrise Towers?
Party member: Did you come here with the duergar?
- Nere: Mercenaries... Absolute unites...
Combat[edit | edit source]
Attacks and abilities[edit | edit source]


Honour mode[edit | edit source]

Allies[edit | edit source]
If not completing ![]() , then additional allies will side with Nere:
, then additional allies will side with Nere:
* = Does not join the fight until it gets close to them
Encounter details[edit | edit source]
If the party completed ![]() then many duergar choose to ally with them against Nere, significantly reducing the difficulty of the fight.
then many duergar choose to ally with them against Nere, significantly reducing the difficulty of the fight.
Multiple enemies have spells that can control the minds of party members. Nere uses ![]() , and both Mind Master Dunnol and Mind Master Fonmara use
, and both Mind Master Dunnol and Mind Master Fonmara use ![]() , forcing the party to waste actions fighting each other.
, forcing the party to waste actions fighting each other.
This battle also occurs next to ![]() Lava which will quickly
Lava which will quickly ![]() anyone who falls into it. Many enemies have ways of pushing party backwards into the lava, such as
anyone who falls into it. Many enemies have ways of pushing party backwards into the lava, such as ![]() , Thrinn's
, Thrinn's ![]() , or Nere's
, or Nere's ![]() on Honour mode. Nere has an abnormally high
on Honour mode. Nere has an abnormally high ![]() bonus of +9 and the
bonus of +9 and the ![]() passive, making it very difficult to shove him (DC 24), though he does not actually possess the Shove ability himself.
passive, making it very difficult to shove him (DC 24), though he does not actually possess the Shove ability himself.
Tactics[edit | edit source]
It is most important to take out the enemies that can mind control party members first.
It is advisable to keep away from the lava as well, as it almost certainly kills anyone who falls inside. However, this can be used to the party's advantage by knocking enemies in, using effects such as ![]() ,
, ![]() ,
, ![]() ,
, ![]() , or
, or ![]() Arrow of Roaring Thunder.
Arrow of Roaring Thunder.
Proximity to a ![]() Sussur Bloom greatly reduces the amount of magic used, thanks to its Sussur Flower Antimagic Field. This is particularly effective against Nere since his spells are far more dangerous than his physical attacks. Failing that, he can be attacked with a Sussur
Sussur Bloom greatly reduces the amount of magic used, thanks to its Sussur Flower Antimagic Field. This is particularly effective against Nere since his spells are far more dangerous than his physical attacks. Failing that, he can be attacked with a Sussur ![]() Greatsword,
Greatsword, ![]() Sickle, or
Sickle, or ![]() Dagger to
Dagger to ![]() him.
him.
In Honor Mode Nere's legendary action, whilst stating it triggers when attacked, instead triggers on many offensive actions which do not require an attack roll. Even spells which do no damage and require no save, such as ![]() trigger it.
trigger it. ![]() him does not impact his ability to trigger this action;
him does not impact his ability to trigger this action; ![]() him prevents him from using it.
him prevents him from using it.
Also, while ![]() are active, the
are active, the ![]() triggered by attacking Nere are centered on the character who triggered the
triggered by attacking Nere are centered on the character who triggered the ![]() , rather than Nere.
, rather than Nere.
Loot[edit | edit source]
It is possible to get both ![]() Gift from the Absolute and
Gift from the Absolute and ![]() Mind Flayer Parasite Specimen by first completing
Mind Flayer Parasite Specimen by first completing ![]() then killing Nere later.
then killing Nere later.
Related quests[edit | edit source]
Gallery[edit | edit source]
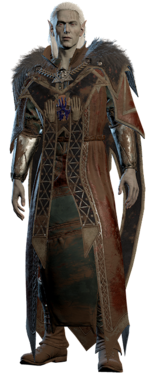
Nere's model
Nere in early access


External links[edit | edit source]
 Nere on the Forgotten Realms Wiki