Ad placeholder
Dror Ragzlin: Difference between revisions
HiddenDragon (talk | contribs) (→Notable Loot: Increased item icon size slightly) |
(Added uid/uuid to infobox) |
||
| (89 intermediate revisions by 21 users not shown) | |||
| Line 3: | Line 3: | ||
| description = Dror Ragzlin is a Hobgoblin Barbarian follower of the Absolute. He can be found at the Shattered Sanctum inside the Goblin Camp, trying to cast Speak with Dead on a Mind Flayer. | | description = Dror Ragzlin is a Hobgoblin Barbarian follower of the Absolute. He can be found at the Shattered Sanctum inside the Goblin Camp, trying to cast Speak with Dead on a Mind Flayer. | ||
| image = Ragzlin.png | | image = Ragzlin.png | ||
}}{{ | }} | ||
|title = | {{Infobox creature | ||
| | | name = Dror Ragzlin | ||
| | | identity = Male | ||
| | | title = True Soul of the Absolute | ||
| | | faction = [[Cult of the Absolute]] | ||
| | | class = [[Barbarian]] | ||
| | | race = [[Hobgoblin]] | ||
| | | hometown = [[Shattered Sanctum]] | ||
| | | image = | ||
|level= | <gallery> | ||
| | Dror Ragzlin Quest.webp|In-game | ||
|type=Humanoid | Portrait Dror Ragzlin.png|Portrait | ||
| | </gallery> | ||
| | | va = Adam Diggle | ||
| | | level = 5 | ||
| | | size = [[Medium]] | ||
|weight= | | type = [[Humanoid]] | ||
| | | ac = 14 | ||
| | | e hp = 52 | ||
| | | hp = 75 | ||
| t hp = 97 | |||
| movement m = 9 | |||
| weight kg = 50 | |||
| xp = 75 | |||
| | | str = 18 | ||
| | | dex = 12 | ||
| | | con = 16 | ||
| | | int = 12 | ||
| | | wis = 10 | ||
| cha = 15 | |||
| cha save prof = yes | |||
| str save prof = yes | |||
| con save prof = yes | |||
| int save prof = yes | |||
| wis save prof = yes | |||
| passives = Danger Sense, Darkvision, Extra Attack, Fast Movement, Martial Advantage, Opportunity Attack, Unarmoured Defence (Barbarian) | |||
| h passives = Danger Sense, Darkvision, Extra Attack, Fast Movement, Legendary Action: Devoted Galvanism, Martial Advantage, Opportunity Attack, Unarmoured Defence (Barbarian) | |||
| athletics = 4 | |||
| acrobatics = 1 | |||
| perception = 0 | |||
== | | uuid = 11337af0-6a57-426b-a820-c4b00923dd54 | ||
Ragzlin | | uid = S_GOB_GoblinKing | ||
| stats = GOB_Hobgoblin_Boss | |||
}} | |||
'''Dror Ragzlin''' is one of the three bosses at the [[Goblin Camp]] who works for the [[Cult of the Absolute]]. The goblin bosses threaten the [[Emerald Grove]] and [[Tiefling Refugees|tiefling refugees]]. | |||
{{DiQ|With fragulous crown, and with sceptre abrade, Dror Ragzlin short work of the innkeeper made!|Volo}} | |||
The | == Overview == | ||
=== Background === | |||
Blessed by the [[Absolute]] and imparted the status of [[True Soul]], Dror commands the goblin forces in the [[Wilderness]] near the Emerald Grove. The Absolute instructed him to scour the wrecked remains of the Nautiloid to find a {{SmRarityItem|Mysterious Artefact}}. He can be encountered in the [[Shattered Sanctum]] attempting to speak with a [[Dead Mind Flayer (Goblin Camp)|mind flayer corpse]]. Depending on party choices, Ragzlin may become an ally or foe throughout Act One. | |||
Ragzlin, {{CharLink|Minthara}} and {{CharLink|Gut}} are True Souls and leaders of the goblins who threaten the Emerald Grove. Thus, it is necessary to kill Ragzlin to save the Emerald Grove and the tieflings. Alternatively, the party can initiate the raid and double-cross Minthara without killing Ragzlin. If the raid is initiated but the goblins are instead defeated and Minthara is killed or knocked out, then {{Quest|Defeat the Goblins}} is completed without killing Dror Ragzlin and Gut. | |||
== Notable | == Involvement == | ||
=== Act One === | |||
Ragzlin and Minthara are first seen during the introductory cutscene to [[Act One]], observing the [[Nautiloid|Nautiloid's]] crash. | |||
==== Shattered Sanctum ==== | |||
The first encounter with Ragzlin is during Act One in the innermost chamber of the Shattered Sanctum of the [[Goblin Camp]], where he casts {{SAI|Speak with Dead}} on a dead mind flayer. The party can assist or hinder his attempt. After a brief dialogue, he delegates the party to Minthara while he deliberates his next move. Otherwise, the party can fight him, causing all characters in the Shattered Sanctum and Goblin Camp to become hostile, except {{CharLink|Abdirak}}, {{CharLink|Brakkal}}, {{CharLink|Liam}}, {{CharLink|Halsin}}, and {{CharLink|Volo}}. | |||
=== Act Two === | |||
==== Mind Flayer Colony ==== | |||
If allowing {{CharLink|Balthazar}} to take the {{CharLink|Aylin|Nightsong}}, the party is tasked with abducting {{CharLink|Isobel Thorm|Isobel}}. Killing or knocking her out grants an audience with {{CharLink|Ketheric Thorm}}, who allows them to pray at the altar of the [[Absolute]]. Doing so causes the party to become imprisoned in a pod within the [[Mind Flayer Colony]] where Balthazar tries to recycle the party into zombies. | |||
In the ensuing combat, the party must fight against [[Zombie Dror Ragzlin]] (if he died in Act One) and [[Zombie Minthara]] (if she died in Act One or was not rescued from [[Moonrise Towers Prison]]). | |||
== Combat == | |||
=== Attacks and abilities === | |||
{{Feature box|Absolute Power}} | |||
{{Feature box|Action Surge}} | |||
{{Feature box|Leadership}} | |||
{{Feature box|Repulsor (Dror Ragzlin)}} | |||
=== Honour mode === | |||
{{Feature box|Arachnid Compulsion}} | |||
{{Feature box|Galvanise}} | |||
=== Allies === | |||
* {{MdCharLink|Gnat|Booyahg Gnat}} | |||
* {{MdCharLink|Cry|Devout Cry}} | |||
* {{MdCharLink|Narvass}} | |||
* {{MdCharLink|Kagran}} | |||
* {{MdCharLink|Roo|Sharp-Eye Roo}} | |||
* {{MdCharLink|Bolt|Warlock Bolt}} | |||
* {{MdCharLink|Huk|Warrior Huk}} | |||
=== Encounter details === | |||
In combat, Dror Ragzlin is an aggressive barbarian who often attempts to engage in melee combat. He has access to various effects that buff nearby allies such as {{SAI|Leadership}} (and {{SAI|Galvanise}} on Honour mode), further empowering the goblin horde. | |||
=== Tactics === | |||
It may be advisable to remove all of Ragzlin's allies first as they all have low hit points and are buffed by his skills if allowed to live. Afterwards, the party can face the hobgoblin himself. | |||
Ragzlin's throne room provides ample opportunities for the party to gain an advantage. One section of the room contains a wooden walkway with a "wooden support" that only has 1 hit point. Luring enemies onto the walkway and then destroying the support can be an easy way to trivialize the fight. | |||
The rafters near the ceiling provide high ground for spell-casters and archers to gain increased accuracy, as well as access to burning braziers with hinges that can be broken to drop onto enemies. Disabling or vision-reducing spells such as {{SAI|Darkness}}, {{SAI|Grease}}, or {{SAI|Hunger of Hadar}} allows the party to engage the enemy group safely from the rafters while the {{Cond|Difficult Terrain}} slows them down. | |||
If convincing the {{CharLink|Larger Giant Spider}} and {{CharLink|Smaller Giant Spider}} to eat the goblins in the main hall and they survive, the spiders proceed to the area outside Ragzlin's throne room. Ragzlin can be lured out of this room to engage the spiders and give the party more allies. | |||
Alternatively, there are several {{SmRarityItem|Smokepowder Barrel|Smokepowder Barrels}} and {{SmRarityItem|Firewine Barrel|Firewine Barrels}} in the locked room near {{CharLink|Roah Moonglow}}. It is possible to preemptively stack them around Dror Ragzlin and ignite them, killing him easily. | |||
=== Notable loot === | |||
* {{MdRarityItem|Dror Ragzlin's Key}} | |||
* {{MdRarityItem|Faithbreaker}} | * {{MdRarityItem|Faithbreaker}} | ||
* {{MdRarityItem| | * {{MdRarityItem|Javelin}} - 3x | ||
* {{MdRarityItem|Mind Flayer Parasite Specimen}} | * {{MdRarityItem|Mind Flayer Parasite Specimen}} | ||
* {{MdRarityItem|Scroll of Speak with Dead}} | |||
== Related literature == | |||
* {{MdRarityItem|Recruiting Gnolls}} | |||
== Speak with Dead == | |||
Dror Ragzlin can be spoken to with {{SAI|Speak with Dead}}. | |||
{{Dialogue start}} | |||
'''Party member:''' Why does the Absolute want the fugitives? | |||
*'''Dror Ragzlin:''' Eternal... glory... ours... | |||
'''Party member:''' What did you want with that mind flayer? | |||
*'''Dror Ragzlin:''' Squid... ship... fugitives... needs... | |||
'''Party member:''' Where's Halsin? | |||
*'''Dror Ragzlin:''' Beast ruttin'... looter... worg pens... | |||
'''Party member:''' Tell me where I can find a healer. | |||
*'''Dror Ragzlin:''' Halsin... caged... | |||
'''Party member:''' Why are you and the drow working together? | |||
*'''Dror Ragzlin:''' Absolute... binds... obedience... | |||
{{Dialogue end}} | |||
== Related quests == | |||
* {{Quest|Defeat the Goblins}} | |||
* {{Quest|Save the First Druid}} | |||
* {{Quest|Save the Refugees}} | |||
== Gallery == | |||
<gallery heights="250"> | |||
Dror Ragzlin Model.png|Ragzlin's model | |||
Ragzlin.png|A smiling Ragzlin | |||
</gallery> | |||
== External | == External links == | ||
* {{FRWiki|Dror Ragzlin|long}} | * {{FRWiki|Dror Ragzlin|long}} | ||
{{ | {{Goblin Camp}} | ||
[[Category: Humanoids]] | [[Category:Humanoids]] | ||
[[Category: Hobgoblins]] | [[Category:Hobgoblins]] | ||
[[Category: | [[Category:Characters]] | ||
[[Category: | [[Category:Characters in the Goblin Camp]] | ||
[[Category: | [[Category:Characters in Act One]] | ||
[[Category: | [[Category:Bosses]] | ||
[[Category:Followers of the Absolute]] | |||
[[Category:Available to Speak with Dead]] | [[Category:Available to Speak with Dead]] | ||
[[Category:Barbarians]] | |||
Latest revision as of 22:39, 23 January 2025

“With fragulous crown, and with sceptre abrade, Dror Ragzlin short work of the innkeeper made!„
Overview[edit | edit source]
Background[edit | edit source]
Blessed by the Absolute and imparted the status of True Soul, Dror commands the goblin forces in the Wilderness near the Emerald Grove. The Absolute instructed him to scour the wrecked remains of the Nautiloid to find a ![]() Mysterious Artefact. He can be encountered in the Shattered Sanctum attempting to speak with a mind flayer corpse. Depending on party choices, Ragzlin may become an ally or foe throughout Act One.
Mysterious Artefact. He can be encountered in the Shattered Sanctum attempting to speak with a mind flayer corpse. Depending on party choices, Ragzlin may become an ally or foe throughout Act One.
Ragzlin, Minthara and Gut are True Souls and leaders of the goblins who threaten the Emerald Grove. Thus, it is necessary to kill Ragzlin to save the Emerald Grove and the tieflings. Alternatively, the party can initiate the raid and double-cross Minthara without killing Ragzlin. If the raid is initiated but the goblins are instead defeated and Minthara is killed or knocked out, then ![]() is completed without killing Dror Ragzlin and Gut.
is completed without killing Dror Ragzlin and Gut.
Involvement[edit | edit source]
Act One[edit | edit source]
Ragzlin and Minthara are first seen during the introductory cutscene to Act One, observing the Nautiloid's crash.
Shattered Sanctum[edit | edit source]
The first encounter with Ragzlin is during Act One in the innermost chamber of the Shattered Sanctum of the Goblin Camp, where he casts ![]() on a dead mind flayer. The party can assist or hinder his attempt. After a brief dialogue, he delegates the party to Minthara while he deliberates his next move. Otherwise, the party can fight him, causing all characters in the Shattered Sanctum and Goblin Camp to become hostile, except Abdirak, Brakkal, Liam, Halsin, and Volo.
on a dead mind flayer. The party can assist or hinder his attempt. After a brief dialogue, he delegates the party to Minthara while he deliberates his next move. Otherwise, the party can fight him, causing all characters in the Shattered Sanctum and Goblin Camp to become hostile, except Abdirak, Brakkal, Liam, Halsin, and Volo.
Act Two[edit | edit source]
Mind Flayer Colony[edit | edit source]
If allowing Balthazar to take the Nightsong, the party is tasked with abducting Isobel. Killing or knocking her out grants an audience with Ketheric Thorm, who allows them to pray at the altar of the Absolute. Doing so causes the party to become imprisoned in a pod within the Mind Flayer Colony where Balthazar tries to recycle the party into zombies.
In the ensuing combat, the party must fight against Zombie Dror Ragzlin (if he died in Act One) and Zombie Minthara (if she died in Act One or was not rescued from Moonrise Towers Prison).
Combat[edit | edit source]
Attacks and abilities[edit | edit source]


Honour mode[edit | edit source]


Allies[edit | edit source]
Encounter details[edit | edit source]
In combat, Dror Ragzlin is an aggressive barbarian who often attempts to engage in melee combat. He has access to various effects that buff nearby allies such as ![]() (and
(and ![]() on Honour mode), further empowering the goblin horde.
on Honour mode), further empowering the goblin horde.
Tactics[edit | edit source]
It may be advisable to remove all of Ragzlin's allies first as they all have low hit points and are buffed by his skills if allowed to live. Afterwards, the party can face the hobgoblin himself.
Ragzlin's throne room provides ample opportunities for the party to gain an advantage. One section of the room contains a wooden walkway with a "wooden support" that only has 1 hit point. Luring enemies onto the walkway and then destroying the support can be an easy way to trivialize the fight.
The rafters near the ceiling provide high ground for spell-casters and archers to gain increased accuracy, as well as access to burning braziers with hinges that can be broken to drop onto enemies. Disabling or vision-reducing spells such as ![]() ,
, ![]() , or
, or ![]() allows the party to engage the enemy group safely from the rafters while the
allows the party to engage the enemy group safely from the rafters while the ![]() slows them down.
slows them down.
If convincing the Larger Giant Spider and Smaller Giant Spider to eat the goblins in the main hall and they survive, the spiders proceed to the area outside Ragzlin's throne room. Ragzlin can be lured out of this room to engage the spiders and give the party more allies.
Alternatively, there are several ![]() Smokepowder Barrels and
Smokepowder Barrels and ![]() Firewine Barrels in the locked room near Roah Moonglow. It is possible to preemptively stack them around Dror Ragzlin and ignite them, killing him easily.
Firewine Barrels in the locked room near Roah Moonglow. It is possible to preemptively stack them around Dror Ragzlin and ignite them, killing him easily.
Notable loot[edit | edit source]
 Dror Ragzlin's Key
 Faithbreaker
 Javelin - 3x
 Mind Flayer Parasite Specimen
 Scroll of Speak with Dead
Related literature[edit | edit source]
Speak with Dead[edit | edit source]
Dror Ragzlin can be spoken to with ![]() .
.
Party member: Why does the Absolute want the fugitives?
- Dror Ragzlin: Eternal... glory... ours...
Party member: What did you want with that mind flayer?
- Dror Ragzlin: Squid... ship... fugitives... needs...
Party member: Where's Halsin?
- Dror Ragzlin: Beast ruttin'... looter... worg pens...
Party member: Tell me where I can find a healer.
- Dror Ragzlin: Halsin... caged...
Party member: Why are you and the drow working together?
- Dror Ragzlin: Absolute... binds... obedience...
Related quests[edit | edit source]
Gallery[edit | edit source]
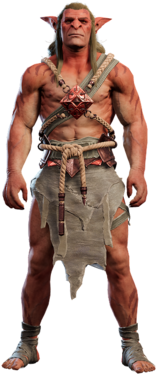
Ragzlin's model
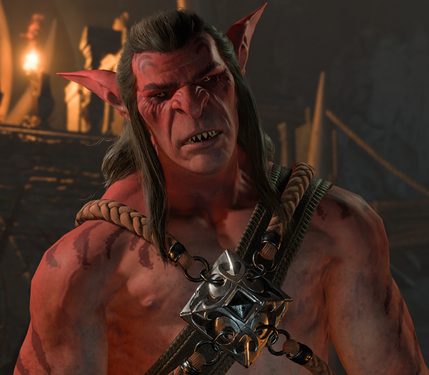
A smiling Ragzlin

