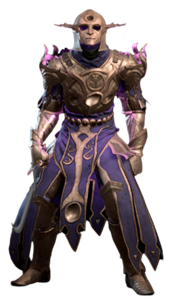
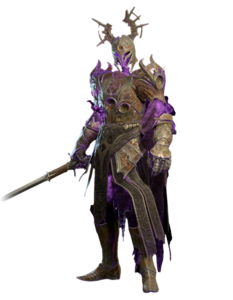
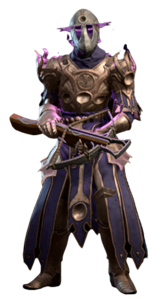
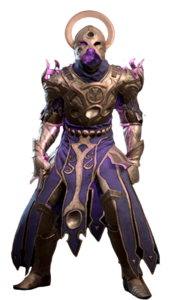
The Gauntlet of Shar is a Location found within the Grand Mausoleum in the Shadow-Cursed Lands. It is the major dungeon of Act Two, featuring many puzzles and combat encounters, while its completion leads to pivotal developments in multiple questlines.
This location plays a central role in Shadowheart's personal quest Daughter of Darkness.
| Shadow-Cursed Lands | ||||
| Gauntlet of Shar | → | Shadowfell | ||
| ↓ | ||||
| Grand Mausoleum | ||||
Walkthrough
There are 4 Umbral Gems in Gauntlet of Shar that are needed in order to progress through the dungeon. In order to find the four gems, the party needs to solve a number of puzzles and encounters. The layout of the dungeon is fairly open-ended past the entry chamber and can be completed in a variety of approaches.
Entrance
Just inside the entrance is a statue with an unobtainable Umbral Gem. Shar speaks directly through the statue, inviting the party to take on her trials and prove themselves worthy. However, directly approaching the statue will trigger a hidden forcefield, repelling the party members.
In order to continue, the party must extinguish eight Mystic Thuribles around the room. There are two side hallways to the east and west of the room, and levers located in alcoves to the north and south of each hallway. Each alcove is protected by one pressure plate and one vent, which can be disarmed with ![]() DC 10 Sleight of Hand check. Activating the traps produce a cloud similar to Hunger of Hadar, minus the acid damage.
DC 10 Sleight of Hand check. Activating the traps produce a cloud similar to Hunger of Hadar, minus the acid damage.
Activate the levers to lower the Thuribles, then interact with them to snuff out their lights. Any Moonlanterns or other sources of light must also be unequipped. Once the room is shrouded in darkness, purple glyphs are revealed around the statue. Follow the gaps in the glyphs to touch the Umbral Gem. This opens the stone door with arcane lock to the north. The gaps in the barriers do not change between playthroughs, allowing the puzzle to be skipped on repeat playthroughs via route memorization.
It is also possible to extinguish the Thuribles without lowering them by casting Ray of Frost on each of them.
Alternatively, the party can bypass the puzzle entirely by teleporting a party member past the stone door via Misty Step, Dimension Door, or other means, then open it with the lever to allow the other members of the party through. It's also possible to jump past the barrier by repetitively jumping through the barrier.
Mushroom cave
West of the entrance, the temple walls degrade and open into a large natural cave overgrown with giant mushrooms, similar in appearance to the Underdark. A Cloaker lies in wait to ambush party at X: -819 Y: -867. Cutting through this cave leads to a kitchen and feasting hall. In an adjoining room at X: -809 Y: -816, five Rats encircle an Altar to Shar; each party member can pass a ![]() DC 14 Religion check to pray at this altar and obtain until next long rest. Failing the check (or praying as a Cleric of Selûne) causes the party member to instead be afflicted by .
DC 14 Religion check to pray at this altar and obtain until next long rest. Failing the check (or praying as a Cleric of Selûne) causes the party member to instead be afflicted by .
Pulling the lever at X: -825 Y: -810 opens the way to the vast antechamber abutting Balthazar's room.
Meeting with Balthazar
Alternatively, heading north from the entrance room, the party enters an open hall with a lift overlooking a massive chasm. Reconstituted Duellists/Marksman, apparently controlled by Balthazar, will attempt to warn the party about the Gauntlet's dark defenders, Dark Justiciars, that will attack the group. Some Umbral Tremors in the area will spawn that continuously summon more Dark Justiciars until all of those Tremors are destroyed. The skeletal undead will fight with the party against the Sharran shades.
If the party moves west, they will encounter more skeletons. A second, larger episode of tremors begins, and Justiciars are summoned to attack the party. Several waves appear, including a tremor in the center of the room that summons a Justiciar Crusader if not destroyed. Following the battle, the door to Balthazar's outpost at X: -852 Y: -786 opens up, revealing the necromancer along with Flesh and three Ghoul Medics. Balthazar assumes the party are True Souls and tells the party to go and complete the trials for him, as the Justiciars have been making it impossible for them to move forward. The party can either agree to help him or attack him outright. Balthazar can be convinced to offer help in the form of a bell that summons his brother, Flesh.
If the party moves east from the lift chamber, they head towards Yurgir's Tribulation.
Vault
Just north of the the antechamber to Balthazar's outpost is a locked Vault door guarding Sharran treasures X: -822 Y: -759. The lock is protected by an exceptional ![]() DC 30 Sleight of Hand check. There is no key for this door, but the Knock spell can be used to bypass the lock.
DC 30 Sleight of Hand check. There is no key for this door, but the Knock spell can be used to bypass the lock.
Trials of Shar
In order to reach the Nightsong, the party must find four ![]() Umbral Gems to access the heart of the Gauntlet.
Umbral Gems to access the heart of the Gauntlet.
Each trial must be started by interacting with the sacrificial bowl at the trial's entrance. If Shadowheart is in the party, she will volunteer each time, gaining ![]() +5 if she is allowed to give blood, and losing
+5 if she is allowed to give blood, and losing ![]() -1 if she is not. Whoever gives blood to begin the trial receives a single turn of Bleeding (Condition).
-1 if she is not. Whoever gives blood to begin the trial receives a single turn of Bleeding (Condition).
Solving all four trials of Shar earns the Inspirational Events In Her Footsteps (Acolyte background) and Recognised by Shadows (Noble background).
Soft-Step Trial
The first trial room is on the left of the Trial Hall, with a plaque that says "Her Most Vaunted Treasure" in front of the door. X: -771 Y: -755
The Soft-Step Trial is a stealth trial. There are two Shadows patrolling a small maze, which must be stealthily navigated to get to the Umbral Gem. Only one character needs to successfully reach the end of the room to complete the trial. If a character is detected, all characters are teleported back to the start of the maze. The entire maze is heavily obscured, requiring the participating character to pass a ![]() DC 10 Stealth check whenever hiding in the Shadow's sightline to pass undetected, or to use Invisibility (a Scroll of Invisibility can be found on a skeleton at X: -775 Y: -767).
DC 10 Stealth check whenever hiding in the Shadow's sightline to pass undetected, or to use Invisibility (a Scroll of Invisibility can be found on a skeleton at X: -775 Y: -767).
It is possible to visit the maze before starting the trial, if having a character in the party, who is good at lockpicking.
A gate blocks the way to the Umbral Gem. The gate guarding the gem can be unlocked with the ![]() Soft-Step Trial Key in a hidden room of the maze (X: -803 Y: -760). The party can flip a lever at X: -803 Y: -753 to unlock this room. The final gate can also be lockpicked with a
Soft-Step Trial Key in a hidden room of the maze (X: -803 Y: -760). The party can flip a lever at X: -803 Y: -753 to unlock this room. The final gate can also be lockpicked with a ![]() DC 10 Sleight of Hand check, or bypassed entirely with a teleporting spell like (a
DC 10 Sleight of Hand check, or bypassed entirely with a teleporting spell like (a ![]() Scroll of Misty Step can be found on a skeleton at X: -807 Y: -762).
Scroll of Misty Step can be found on a skeleton at X: -807 Y: -762).
Once the party has the Gem, a transporter will appear that can be interacted with to teleport any characters to the beginning of the room.
Self-Same Trial
Along the corridor to the north from the Soft-Step Trial is a door with a plaque that says "Her Most Hallowed Mercy". This is the entrance to the Self-same Trial X: -767 Y: -727.
To complete this trial, the party must defeat shadowy copies of themselves. These copies have the same abilities and gear as the real thing, and cannot be restrained or shoved. If a character attacks a copy of a different party member while their own copy is still alive, they will receive a stack of , reducing all Ability Scores by 1 until Remove Curse is used or the party takes a long rest. The debuff stacks up to four times. Once a party member's copy is dead, they can freely attack the other copies with no debuff incurred.
Familiars and other summoned creatures are not duplicated, and can freely attack anyone without incurring penalties.
Only party members that are within the trial room will be copied into reflections and entered into the trial. Placing additional party members outside the room and trying to sneak them through by opening the door later will forfeit the trial; however, this can be bypassed if there is no door. Destroying the door and sneaking in additional party members after the fact can allow the trial to be trivialized by a single character.
Once all the shadow copies are defeated, one of them will drop an Umbral Gem to be looted, and the transporter on the upper level of the room will activate to give a shortcut back to the entrance. ![]() Killer's Sweetheart can be found on the top level.
Killer's Sweetheart can be found on the top level.
Faith-Leap Trial
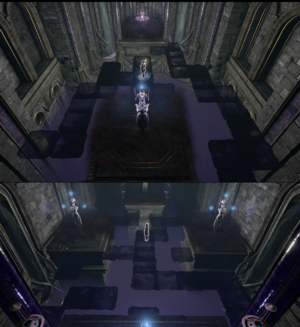
From the Self-Same Trial, head north and down the stairs. At the bottom, the party comes across a door to the Faith-Leap Trial. There is a plaque on the outside of the door that reads "Her Most Sacred Path".
In order to complete this trial, a character must follow an invisible path, as marked on the mosaic floor in front of the sacrificial bowl. Straying from the path will return the character to the start of the trial or to the nearest platform, but only up to three times; failures after the third will instead instantly kill the character and then teleport them to the nearest platform. NOTE: In Honour Mode even a single misstep results in immediate death.
This is very simple: it is not a test of memory but of faith in Shar's darkness. The map is a distraction. First, don't forget to use the sacrificial altar, else the umbral gem will not appear at the far end of the hall. Once done, simply click on the platform where the gem is to jog straight across the darkness and collect your prize.
Once the final platform is reached, looting the Umbral Gem will trigger another teleporter that can bring characters back to the entrance quickly.
Yurgir's Tribulation
The fourth and final Umbral Gem is in the possession of the orthon Yurgir in the eastern branch of the Gauntlet at X: -652 Y: -776, lying near his bed of corpses. The party can fight him or help him resolve his contract with Raphael, which starts the quest Break Yurgir's Contract. It is also possible to steal the gem and get out unnoticed with sufficient stealth or Invisibility.
Choosing to side with Yurgir will have the party hunting down the last of the living Dark Justiciars in the Shadow-Cursed Lands, Lyrthindor. Following cragged rocks opposite from the Silent Library (starting at X: -736 Y: -753) all the way downward into a small grotto, the party will come across a ritual circle at X: -708 Y: -722. Attacking a rat elsewhere in the Gauntlet will cause the surviving rats to eventually swarm all the way downward into the grotto. Following these rats is a simple way to locate the area. Lighting the candles will summon a rat, who offers to reveal a hidden treasure cache (X: -685 Y: -710, unobtainable without accepting the rat's bargain) in exchange for his life. Attacking the rat begins a battle with a swarm of rats who eventually coalesce into Lyrthindor.
Crossing the chasm to the other side and completing some jumps into an alcove, the party can reach a Stone Door (X: -663 Y: -721). Beyond the door is an abandoned ritual room containing a broken Mirror of Loss and a ![]() Silver Key, which unlocks a nearby chest. Leaving the room and returning to the chasm, the party can climb upwards along the rocky outcroppings to reach the area where Yurgir stands once again to claim their reward.
Silver Key, which unlocks a nearby chest. Leaving the room and returning to the chasm, the party can climb upwards along the rocky outcroppings to reach the area where Yurgir stands once again to claim their reward.
The Silent Library
Once all four Umbral Gems are in the party's possession, it is possible to complete the Gauntlet of Shar and proceed to the Nightsong. However, if she is in the party, Shadowheart will have a request: she wants to find the Spear of Night in the Silent Library so that she can become a Dark Justiciar.
The door to the Silent Library is located south of the Faith-Step Trial. The Library is heavily-trapped and patrolled by several undead Dark Justiciars. The Librarian can also be found here, generating a Silence effect that covers the entire Library and keeps any spells from being cast inside while the Librarian lives.
One of the trapped (![]() DC 15 Perception check to reveal,
DC 15 Perception check to reveal, ![]() DC 14 Sleight of Hand check to disarm) bookshelves in the north east of the library contains a book called
DC 14 Sleight of Hand check to disarm) bookshelves in the north east of the library contains a book called ![]() Teachings of Loss: The Nightsinger X: -772 Y: -741. The trap itself triggers a lowly and can easily be tanked if the party's ability checks aren't up to snuff.
Teachings of Loss: The Nightsinger X: -772 Y: -741. The trap itself triggers a lowly and can easily be tanked if the party's ability checks aren't up to snuff.
A button at X: -784 Y: -747 unlocks the Iron Portcullis to the next chamber. Alternatively, the gate can be lockpicked (![]() DC 21 Sleight of Hand check), or the lever that opens it from the other side can be hit with a ranged attack from certain angles. The chamber contains a pedestal named The Riddle of the Night, which accepts Teachings of Loss: The Nightsinger and produces the
DC 21 Sleight of Hand check), or the lever that opens it from the other side can be hit with a ranged attack from certain angles. The chamber contains a pedestal named The Riddle of the Night, which accepts Teachings of Loss: The Nightsinger and produces the ![]() Spear of Night,
Spear of Night, ![]() Dark Justiciar Half-Plate, and a
Dark Justiciar Half-Plate, and a ![]() Dark Justiciar Helmet.
Dark Justiciar Helmet.
Find the Nightsong
Return to the Pedestal of Reckoning to the north of the entrance hall. Placing one of the four Umbral Gems on the altar unlocks a platform. Move onto the platform then activate the switch to take the party downwards.
At the bottom is another altar. Place the remaining three Umbral Gems on the altar, opening the final massive doors. This door can also be opened with Knock, allowing parties to bypass the trials if they lose an Umbral Gem or simply do not want to complete them. Inside lies the Verge of the Shadows waypoint and a pool of water that serves as a portal to the Shadowfell. If Shadowheart is in the party she will want to pray.
Entering the portal will take the party to the Nightsong's chamber.
Entering the portal serves as the 'cut-off' point for Act 2, after which it will no longer be possible to return to any Act 1 areas (including the Rosymorn Monastery Trail and Creche Y'llek), and which will cause several quests to fail if they have not yet been completed.
The following sequence within the Shadowfell completes the quest The Chosen of Shar.
Waypoints
This location contains the following :
- Gauntlet of Shar X: -758 Y: -794
- Verge of the Shadows X: -722 Y: -842
Related Locations
Related quests
Notable loot
Notable items obtained in this location, whether looted, purchased, or obtained as a quest reward:
 Boots of Brilliance - North of Yurgir at (X: -632, Y: -723)
 Hellfire Hand Crossbow - Dropped by Yurgir
 Dark Justiciar Gauntlets - Found lying on a pile of boxes near Yurgir at (X: -660 Y: -760)
 Least Expected - Found in the NE of the dungeon just before Yurgir at (X: -730, Y: -800)
 Callous Glow Ring - Found in a vault (Lockpick DC30) near Balthazar at (X: -821, Y: -752)
 Justiciar's Scimitar - Dropped by Lyrthindor
 Justiciar's Greatshield Dropped by Lyrthindor
 Killer's Sweetheart - In the Self-Same Trial at (X: -833, Y: -729)
 Circle of Bones - Dropped by Balthazar
 Spear of Night - In the Silent Library
 Dark Justiciar Helmet - In a chest next to the Spear of Night
 Dark Justiciar Half-Plate - At the bottom of the altar with the Spear of Night
Notable NPCs
Notable monsters
External links
This article has been proposed for deletion. Functionally replaced by new navboxes. Please discuss on the article's talk page. |


