Ad placeholder
Acquire the Gauntlets for Helsik: Difference between revisions
HiddenDragon (talk | contribs) (Added pageseo) |
(→Meeting Hope: Fix link) |
||
| (2 intermediate revisions by 2 users not shown) | |||
| Line 3: | Line 3: | ||
| image = Helsik Gauntlets Quest.jpg | | image = Helsik Gauntlets Quest.jpg | ||
}} | }} | ||
[[File:Helsik Gauntlets Quest.jpg|thumb|Helsik needs powerful gauntlets to move her stock.]] | [[File:Helsik Gauntlets Quest.jpg|thumb|{{noexcerpt|Helsik needs powerful gauntlets to move her stock.}}]] | ||
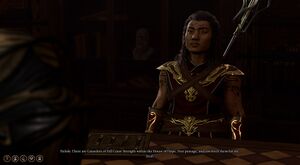
'''Acquire the Gauntlets for Helsik''' is a [[Quest]] in [[Act Three]] of Baldur's Gate 3. It can be started by speaking to {{CharLink|Helsik}} in [[Devil's Fee]]. | '''Acquire the Gauntlets for Helsik''' is a [[Quest]] in [[Act Three]] of Baldur's Gate 3. It can be started by speaking to {{CharLink|Helsik}} in [[Devil's Fee]]. | ||
__TOC__ | __TOC__ | ||
| Line 9: | Line 9: | ||
==Objectives== | ==Objectives== | ||
{{Quest objective|Reach the House of Hope.| | |||
* Helsik the diabolist said she will help us reach the [[House of Hope]] if we steal a powerful artefact for her while we're there: [[Gauntlets of Hill Giant Strength]]. We agreed to the deal. She gave us a note with precise instructions - we should follow them in the ritual room upstairs. | * Helsik the diabolist said she will help us reach the [[House of Hope]] if we steal a powerful artefact for her while we're there: [[Gauntlets of Hill Giant Strength]]. We agreed to the deal. She gave us a note with precise instructions - we should follow them in the ritual room upstairs. | ||
}} | |||
{{Quest objective|Find and steal the gauntlets for Helsik.| | |||
* We made it to the House of Hope. We should keep an eye out for the gauntlets that Helsik wants. | * We made it to the House of Hope. We should keep an eye out for the gauntlets that Helsik wants. | ||
}} | |||
{{Quest objective|Return to Helsik with the gauntlets.| | |||
* We stole the gauntlets. We should give them to Helsik as promised when we leave the House of Hope. | * We stole the gauntlets. We should give them to Helsik as promised when we leave the House of Hope. | ||
}} | |||
{{Quest objective|Quest Complete| | |||
* We gave Helsik the gauntlets, upholding our side of the deal. | * We gave Helsik the gauntlets, upholding our side of the deal. | ||
* Helsik was defeated. She won't be needing the gauntlets anymore. | * Helsik was defeated. She won't be needing the gauntlets anymore. | ||
| Line 32: | Line 24: | ||
* We decided to keep the gauntlets for ourselves, but to uphold our side of the deal, we paid her in gold instead. | * We decided to keep the gauntlets for ourselves, but to uphold our side of the deal, we paid her in gold instead. | ||
* We failed to uphold our side of the deal with Helsik. We must press on. | * We failed to uphold our side of the deal with Helsik. We must press on. | ||
}} | |||
== Walkthrough == | == Walkthrough == | ||
| Line 53: | Line 45: | ||
=== Meeting Hope === | === Meeting Hope === | ||
[[File:House of Hope Map Quest.jpg|thumb|A map to the House of Hope.]] | [[File:House of Hope Map Quest.jpg|thumb|A map to the House of Hope.]] | ||
Once inside the House of Hope, a strange dwarf will appear to greet the party. She believes the party are in great danger, and she herself is dealing with her jailers, but she can be convinced to stick around. Asking her who she is reveals she is {{CharLink|Hope}}, and she is trapped in the prison. Only the {{SmRarityItem|Orphic Hammer}} can release her from her bonds. She explains that it is necessary to get past the Debtors and sneak to the Archive to get their contract. To aid the party, she gives them a {{SmRarityItem|Debtor's | Once inside the House of Hope, a strange dwarf will appear to greet the party. She believes the party are in great danger, and she herself is dealing with her jailers, but she can be convinced to stick around. Asking her who she is reveals she is {{CharLink|Hope}}, and she is trapped in the prison. Only the {{SmRarityItem|Orphic Hammer}} can release her from her bonds. She explains that it is necessary to get past the Debtors and sneak to the Archive to get their contract. To aid the party, she gives them a {{SmRarityItem|Debtor's Attire}} so that they can move about the House undetected. | ||
=== The Archives === | === The Archives === | ||
Latest revision as of 20:35, 18 August 2024
Acquire the Gauntlets for Helsik is a Quest in Act Three of Baldur's Gate 3. It can be started by speaking to Helsik in Devil's Fee.
Objectives[edit | edit source]
Walkthrough[edit | edit source]
The Devil's Fee[edit | edit source]
Helsik, can be found at the Devil's Fee. Inquiring about Helsik being a diabolist has her revealing that her true business is not in information or hellish curious. She is Mammon's Picklock, Latchkeeper of the Nine Hells. She breaks people into the Hells, for a cost. With a successful Persuasion check (DC 20), she waives the fee in lieu of the ![]() Gauntlets of Hill Giant Strength, which starts this quest.
Gauntlets of Hill Giant Strength, which starts this quest.
Striking a deal with Helsik, she gives the party all the tools needed to open a portal to Hell. This includes a ![]() Grimoire Bound in Imp Skin and a
Grimoire Bound in Imp Skin and a ![]() Ritual Pouch with all the necessary items. Go upstairs in the Devil's Fee to find a circle in blood. Read the Grimoire Bound in Imp Skin to learn the ritual, then place the ritual items in the correct areas. Starting from the point closest to Helsik's diary and going clockwise:
Ritual Pouch with all the necessary items. Go upstairs in the Devil's Fee to find a circle in blood. Read the Grimoire Bound in Imp Skin to learn the ritual, then place the ritual items in the correct areas. Starting from the point closest to Helsik's diary and going clockwise:
- Skull X: -35 Y: 6
- Coin of Mammon X: -34 Y: 8
- Empty spot
- Diamond X: -30 Y: 7
- Incense X: -29 Y: 4
- Empty spot
- Empty spot
Then, drop the Infernal Marble in the center of the circle and a portal to hell opens.
Meeting Hope[edit | edit source]
Once inside the House of Hope, a strange dwarf will appear to greet the party. She believes the party are in great danger, and she herself is dealing with her jailers, but she can be convinced to stick around. Asking her who she is reveals she is Hope, and she is trapped in the prison. Only the ![]() Orphic Hammer can release her from her bonds. She explains that it is necessary to get past the Debtors and sneak to the Archive to get their contract. To aid the party, she gives them a
Orphic Hammer can release her from her bonds. She explains that it is necessary to get past the Debtors and sneak to the Archive to get their contract. To aid the party, she gives them a ![]() Debtor's Attire so that they can move about the House undetected.
Debtor's Attire so that they can move about the House undetected.
The Archives[edit | edit source]
The Gauntlets are in the Archives, as one of Raphael's newest acquisitions. They are in the northernmost corner of the room X: -6548 Y: 2939. The platform the Gauntlets are on is rigged with a pressure plate, so they can either be swapped out with another pair of gauntlets or the trap can be disarmed before the item is stolen. Then, the party can sneak off, as with stealing anything.
If intending to steal either the ![]() Soul-Sworn Contract in or the Orphic Hammer in / , then disarming the trap and sneaking to steal the Gauntlets is unnecessary, as the alarm goes off anyways once the Hammer/Contract is taken.
Soul-Sworn Contract in or the Orphic Hammer in / , then disarming the trap and sneaking to steal the Gauntlets is unnecessary, as the alarm goes off anyways once the Hammer/Contract is taken.
Returning to Helsik[edit | edit source]
Once returning from Hell, Helsik demands the Gauntlets. The party can hand them over, refuse to do so, or attempt to pass a ![]() DC 10 Deception check to say that they don't have them. If the Gauntlets are handed over, they won't appear in Helsik's trading inventory and cannot be pickpocketed back. If refusing to hand them over, Helsik will permanently refuse to trade with the party member who did not fulfill the bargain. However, other party members can begin the same conversation with her fom the start. Additionally it is possible to deceive her (DC 10) by saying the party don't have the Gauntlets. On a successful roll she'll say that invalidates the bargain and demands a 20,000 gold payment for the trip. The party can pay off the gold fee instead of handing over the Gauntlets. At this point it is possible to tell her the party will leave with the Gauntlets, can't afford the fee, or attempt a
DC 10 Deception check to say that they don't have them. If the Gauntlets are handed over, they won't appear in Helsik's trading inventory and cannot be pickpocketed back. If refusing to hand them over, Helsik will permanently refuse to trade with the party member who did not fulfill the bargain. However, other party members can begin the same conversation with her fom the start. Additionally it is possible to deceive her (DC 10) by saying the party don't have the Gauntlets. On a successful roll she'll say that invalidates the bargain and demands a 20,000 gold payment for the trip. The party can pay off the gold fee instead of handing over the Gauntlets. At this point it is possible to tell her the party will leave with the Gauntlets, can't afford the fee, or attempt a ![]() DC 10 Intimidation check by saying I just killed a devil in his own home. You really don't want to test my patience. Intimidating her allows to the party to keep the Gauntlets and continue to trade with her.
DC 10 Intimidation check by saying I just killed a devil in his own home. You really don't want to test my patience. Intimidating her allows to the party to keep the Gauntlets and continue to trade with her.


