Ad placeholder
Free the Artist: Difference between revisions
(→Bugs: - Noted that the Portrait Bug is fixed) |
HiddenDragon (talk | contribs) |
||
| Line 107: | Line 107: | ||
If choosing "A 'pet artist'?" to ask Brem more about Oskar, he explains they found him wandering the wilds, and that he needed protection. Choosing "'Protection'. It sounds a bit more like kidnapping." results in a dialogue about letting Oskar go: | If choosing "A 'pet artist'?" to ask Brem more about Oskar, he explains they found him wandering the wilds, and that he needed protection. Choosing "'Protection'. It sounds a bit more like kidnapping." results in a dialogue about letting Oskar go: | ||
* {{Dialogue option|Fine, I'll buy him. How much?}} | * {{Dialogue option|Fine, I'll buy him. How much?}} | ||
* {{Dialogue option|We can skip threats and go straight to blades, if you like.|roll=Intimidation|dc=20}} | * {{Dialogue option|'''''ROAR.'''''|tags=Berserker|roll=Intimidation|dc=20|advantage=y}} | ||
* {{Dialogue option|If he's as talented as you say, someone will be looking for him.|roll=Persuasion|dc=20}} | * {{Dialogue option|We can skip threats and go straight to blades, if you like.|roll=Intimidation|dc=20}} {{Approval|Gale|+1}} {{Approval|Lae'zel|+1}} {{Approval|Shadowheart|+1}} {{Approval|Wyll|+1}} {{Approval|Karlach|+1}} | ||
* {{Dialogue option|Art's more valuable once the creator is dead. I can arrange that|tags=Rogue|roll=Persuasion|dc=15|advantage=y}} | * {{Dialogue option|If he's as talented as you say, someone will be looking for him.|roll=Persuasion|dc=20}} {{Approval|Gale|+1}} {{Approval|Lae'zel|+1}} {{Approval|Shadowheart|+1}} {{Approval|Wyll|+1}} {{Approval|Karlach|+1}} | ||
* {{Dialogue option|Art's more valuable once the creator is dead. I can arrange that|tags=Rogue|roll=Persuasion|dc=15|advantage=y}} {{Approval|Gale|+1}} {{Approval|Lae'zel|+1}} {{Approval|Shadowheart|+1}} {{Approval|Wyll|+1}} {{Approval|Karlach|+1}} | |||
* {{Dialogue option|If this artist were to ''tragically'' expire, his portfolio would become finite - therefore priceless.|tags=Bard|roll=Persuasion|dc=15|advantage=y}} | * {{Dialogue option|If this artist were to ''tragically'' expire, his portfolio would become finite - therefore priceless.|tags=Bard|roll=Persuasion|dc=15|advantage=y}} | ||
* {{Dialogue option|Slavekeeping's bad for business with any halfway-moral customer. Let him go.|tags=Paladin|roll=Persuasion|dc=15}} | * {{Dialogue option|Slavekeeping's bad for business with any halfway-moral customer. Let him go.|tags=Paladin|roll=Persuasion|dc=15}} | ||
* {{Dialogue option|Here's my offer: give me your slave, or become mine.|tags=Githyanki|roll=Intimidation|dc=15|advantage=y}} | * {{Dialogue option|Here's my offer: give me your slave, or become mine.|tags=Githyanki|roll=Intimidation|dc=15|advantage=y}} {{Approval|Gale|+1}} {{Approval|Lae'zel|+1}} {{Approval|Shadowheart|+1}} {{Approval|Wyll|+1}} {{Approval|Karlach|+1}} | ||
Choosing "Fine, I'll buy him. How much?" causes Brem to name a price - 1000 gold. This price can be knocked down to 600 gold with a successful Persuasion roll (DC 15) or Intimidation (DC 20). | Choosing "Fine, I'll buy him. How much?" causes Brem to name a price - 1000 gold. This price can be knocked down to 600 gold with a successful Persuasion roll (DC 15) or Intimidation (DC 20). | ||
Revision as of 19:52, 7 October 2024
Free the Artist is a Quest in Act One and Act Three of Baldur's Gate 3. It is started by speaking with Oskar Fevras at the Zhentarim Basement in Act One and does not resume until Act Three in Baldur's Gate.
Objectives
Objectives and journal entries may vary pending story decisions and outcomes.
Walkthrough
The Zhentarim Hideout
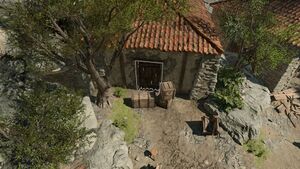
During Act One, to find Oskar, the Zhentarim Hideout must first be located. It's in a barn west of Waukeen's Rest, at the shabby door (X:-113, Y:613). The party will automatically be aware of the Zhentarim Hideout depending on how was dealt with. If the party undertook this quest and managed to spare Rugan's life, he shares the location of the hideout along with the password need to enter. With a successful perception check, the party notices a man, Salazon, crouching behind some shelves. Reciting the password 'Little serpent, long shadow' has him stand down immediately and provide the key to a wardrobe that leads into the hideout. If the party does not have the password, there are a myriad of other options to get past Salazon:
- Read his mind.
- [BERSERKER] [INTIMIDATION] Do NOT make me angry! (DC 15
 )
) - [BARBARIAN] [INTIMIDATION] Careful. You won't kill me, but you will make me mad. (DC 15)
- [PERSUASION] Just calm down - I'm not here to fight. (DC 15)
- [ROGUE] [PERSUASION] This is all pretty crude, as traps go - you'll probably kill us both. (DC 15
 )
) - [SORCERER] [PERSUASION] I am magic. Cast that spell - you'll only hurt yourself. (DC 15
 )
) - [DRACONIC SORCERER] [PERSUASION] Fire is in my blood. Do it. Let's see who survives. (DC 15)
- [WILD MAGIC] [PERSUASION] Every spell I cast could be my last. You think I fear death? (DC 15)
- [WIZARD] [PERSUASION] That spell, in close quarters? You're going to hurt yourself. (DC 15
 )
)
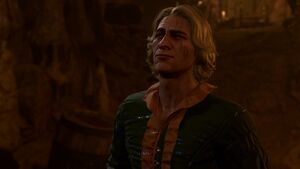
Succeeding to make the man stand down allows the Zhentarim to be dealt with peacefully. Enter the Zhentarim Basement and follow the path down to encounter Brem (X:295, Y:-250). Brem is a trader for the Zhentarim and he's holding an artist, Oskar Fevras, hostage. He offers to have Oskar paint a portrait, for a fee. Speaking to Brem before Oskar provides unique dialogue options to persuade him that Oskar is more trouble than he's worth.
If choosing "A 'pet artist'?" to ask Brem more about Oskar, he explains they found him wandering the wilds, and that he needed protection. Choosing "'Protection'. It sounds a bit more like kidnapping." results in a dialogue about letting Oskar go:
- Fine, I'll buy him. How much?
- [BERSERKER] [INTIMIDATION] ROAR. (DC 20
 )
) - [INTIMIDATION] We can skip threats and go straight to blades, if you like. (DC 20)
 +1
+1  +1
+1  +1
+1  +1
+1  +1
+1 - [PERSUASION] If he's as talented as you say, someone will be looking for him. (DC 20)
 +1
+1  +1
+1  +1
+1  +1
+1  +1
+1 - [ROGUE] [PERSUASION] Art's more valuable once the creator is dead. I can arrange that (DC 15
 )
)  +1
+1  +1
+1  +1
+1  +1
+1  +1
+1 - [BARD] [PERSUASION] If this artist were to tragically expire, his portfolio would become finite - therefore priceless. (DC 15
 )
) - [PALADIN] [PERSUASION] Slavekeeping's bad for business with any halfway-moral customer. Let him go. (DC 15)
- [GITHYANKI] [INTIMIDATION] Here's my offer: give me your slave, or become mine. (DC 15
 )
)  +1
+1  +1
+1  +1
+1  +1
+1  +1
+1
Choosing "Fine, I'll buy him. How much?" causes Brem to name a price - 1000 gold. This price can be knocked down to 600 gold with a successful Persuasion roll (DC 15) or Intimidation (DC 20).
If speaking to Oskar to inform him of the good news, then more information can be gleaned about Oskar - he's engaged to a wealthy woman but conflicted about leaving behind his first love. He asks for more gold for the road, stating his fiancé will repay the party handsomely for rescuing him. Regardless of if the party pays up, he'll successfully escape and return to Baldur's Gate.
Lady Jannath's Estate
Once in Act Three, the party can attempt to meet with Oskar in Baldur's Gate. Oskar can be sought out within the Lower City at Lady Jannath's Estate (X:-254, Y:-76). A butler named Tarhun Mnemonis guards the door. Tarhun explains that Lady Jannath sent away all the servants on vacation, including him. As he is on vacation, he cannot stop anyone from entering the estate, but he does warn against it. While the conversation is going on, screaming and banging can be heard from within the mansion.
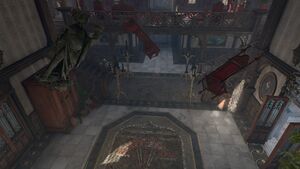
Entering the mansion, it's clear something ghostly is occurring. Chairs and various objects are floating and, as the party climbs the stairs, they start to attack. Use dash to climb the steps as fast as possible and enter the upstairs bedroom (X:-251, Y:-55) to initiate a cutscene with Lady Jannath and a possessed Oskar. Three Poltergeists appear to attack the party. Knocking out Oskar will immediately kill the three poltergeists. Killing Oscar causes Jannath to immediately kick the party out and prematurely end the quest.
If the party can't knock Oskar out and must instead kill the poltergeists manually, they'll turn invisible. ![]() Volo's Ersatz Eye and other sources of can help in this encounter. and are also helpful.
Volo's Ersatz Eye and other sources of can help in this encounter. and are also helpful.
Once the poltergeists are dealt with, Jannath pleads with the party to help her. She needs discretion, which is why she sent the servants away. She notes that there appears to be something off about the atelier at the top floor and directs the party to investigate there.
If going to the atelier the party has to deal with a number of cursed skulls. The skulls deal thunder damage and knock back the party. Using can stop the skulls from casting their spells. Then the party can utilize or use throw a "thrown" bludgeoning weapon at them, which will destroy them in one attack. Also is useful to get rid of the skulls.
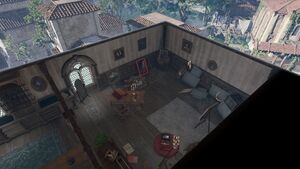
Once in the atelier (X:-268, Y:-52), a perception check reveals a strange wall. The wall can be accessed by a trick with Oskar's portraits. Stealing the portrait of Oskar that's against the western wall and then combining it with the empty easel opens up an additional section of the room and the possessed portrait within. There's also a locked chest behind the portrait. Lockpick the chest (DC 20) and read the ![]() Letter to Oskar Fevras within. The letter reveals that Oskar was corresponding with someone named Mystic Carrion who was helping him with his ghostly problems.
Letter to Oskar Fevras within. The letter reveals that Oskar was corresponding with someone named Mystic Carrion who was helping him with his ghostly problems.
Mystic Carrion's Mansion
Go to Philgrave's Mansion (X:-8, Y:-158) to find Mystic Carrion. The western wall can either be destroyed, lockpicked, or the passphrase from Oskar's letter can be used to open it.
Talk to Mystic Carrion about Oskar, and he remembers dealing with him. He offers a solution - the ![]() Torch of Revocation - for the price of 3000 gold. He is, however, willing to waive the fee if the party agrees to find his missing servant, Thrumbo, as part of . If Mystic Carrion is dead, the Torch can be found in a gilded chest behind where he was originally encountered (X:18, Y:-162).
Torch of Revocation - for the price of 3000 gold. He is, however, willing to waive the fee if the party agrees to find his missing servant, Thrumbo, as part of . If Mystic Carrion is dead, the Torch can be found in a gilded chest behind where he was originally encountered (X:18, Y:-162).
However the Torch is acquired, bring it back to the atelier and equip it. Then, use it on the possessed portrait (if it's equipped as a torch, perform an off-hand melee attack) to free the spirit of Kerri Evenfield. The ghost inside is enraged at the fact that Oskar trapped her, and wants revenge. Kerri can be persuaded or intimidated (DC 15) into backing down from killing Oskar. Otherwise, she'll attack the party with two Vengeful Souls and two Tormented Souls. After this all the invisible Poltergeists throughout the house will immediately die.
If saving Oskar by fighting Kerri then Lady Jannath will be upset about Oskar putting them in danger. The party can choose to help Oskar or tell Lady Jannath the truth.
If both Oskar and his marriage are saved, he'll be immensely grateful and offer to paint a portrait as a reward. He goes up to the atelier and starts painting whenever the party is ready. He also allows the title to be chosen by the party, which does not affect the price of the portrait. [See: Bugs]
Quest rewards
- An original painting by Oskar Fevras for saving both Oskar and his marriage, which can be sold for 1.500 gold.
 Till Death Do Us Part and
  After Death Do Us Part for fighting Kerri and telling Jannath the truth (Oskar will leave and drop After Death Do Us Part on the floor just outside the bedroom).
- Leaving Oskar to Kerri also rewards After Death Do Us Part.
Notes
- The party does NOT need to pay the additional 200 gold when freeing Oskar for him to show up in Baldur's Gate and continue the questline, the extra 200 gold is for changing around companion reputation.
- The party may also choose to continue this quest if they chose to buy Oskar and treat him as a slave, resulting in him fleeing the party on bad terms. This all seems to be forgotten when the party reaches Baldur's Gate, and the quest continues as normal.
- If a romantic partner is in the party, when Oskar paints a portrait of the player character, they will comment on how attractive it makes the player character look.
- It is possible to obtain multiple paintings by talking to Oskar with different characters.
Bugs
- Prior to Patch 7, the portrait painted by Oskar would not always have been of the party member who spoke with him.
- The poltergeists in Lady Jannath’s mansion can behave erratically, skipping multiple turns in a row without taking any actions.
- The party can visit Mystic Carrion and ask for assistance with Oskar's condition before they visit Lady Jannath's Estate, despite having no way to know about him becoming possessed.
