Ad placeholder
Goblin Camp: Difference between revisions
DrakeCross22 (talk | contribs) (Added interactions with the booze tub.) |
No edit summary |
||
| (102 intermediate revisions by 33 users not shown) | |||
| Line 1: | Line 1: | ||
{{Location page | |||
The | | prefix = The | ||
| name = Goblin Camp | |||
| alt name = | |||
| image = Goblin Camp Overview.jpg | |||
| image description = The Goblin Camp Overview. | |||
| act = one | |||
| summary = It is the exterior area of the [[Shattered Sanctum]]. | |||
| region prefix = the | |||
| region = Wilderness | |||
| south = Sunlit Wetlands | |||
| north = Shattered Sanctum | |||
| east = Blighted Village | |||
| west = Rosymorn Monastery Trail | |||
}} | |||
{{DiQ|Hear Volo! I cry far and wide for great glory! | |||
Mountains' great mortals, all ginders to quake. | |||
Laugh if you dare! Recoil, as you must! | |||
The True Souls are coming, their louders awake. | |||
His name is Dror Ragzlin, his voice Absolute. | |||
Dror Ragzlin's best make is a blade in the quarry! | |||
His troops will disarm you and groar you the truth! | |||
Be you beguiled or be you beheaded - | |||
- goblinkind will attease and frelk you, areaded! | |||
A new age is dawning, with goblins atrust!|Volo| desperately trying to entertain the goblin raiders.}} | |||
{{TOC|limit=3}} | |||
== | == Overview == | ||
===Access=== | [[File:Goblin Camp.jpg|thumb|The entrance to the Shattered Sanctum from the Goblin Camp.]] | ||
The '''Goblin Camp''' | === Access === | ||
The main entrance of the '''Goblin Camp''' can be reached after crossing the wooden bridge at {{Coords|-50|369}} in the [[Forest]]. Alternate entries are possible. | |||
* Leaping off the road beside a Hunter's Stash in the Forest south of the wooden bridge, then crossing the fallen log at {{Coords|-28|315}}. Feather Fall is recommended. Reaching the entrance of the trapped tunnels rewards 15 xp. | |||
* Leaping off the cliff west of the windmill, behind the broken shrine of {{CharLink|Selûne}} in the [[Blighted Village]], then crossing the stone bridge at {{Coords|-53|455}}. Feather Fall is required. This rewards 15 xp. | |||
== | === Forest road checkpoint === | ||
{{ | To reach the camp, the guard post along the main road must be bypassed. A passive {{Ability Check|Intelligence|10}} reveals this is a goblin outpost and highlights the war drum. | ||
==== Trapped tunnel ==== | |||
To bypass the check point, or if entering via the fallen log bridge, passing a passive {{Ability Check|Perception|17}} reveals a tunnel to the south rigged with blast mines. The mines deal {{DamageText|2d6|Fire}} with a {{Saving Throw|DEX|dc=12}} to halve the damage. The mines can be disabled with a {{Ability Check|Sleight of Hand|10}}. It is also possible to travel around the checkpoint by jumping over a small bottomless pit. | |||
==== Check point interactions ==== | |||
When approaching the guard post, {{CharLink|Olak|Sentinel Olak}} is quick to question and threaten the party. There are a few ways to bypass him without fighting: | |||
* | * {{CharLink|Sazza}} vouches for the party as part of the {{Quest|Save the Goblin Sazza}} quest. | ||
* As a [[Drow|drow]], or appearing as a drow using {{SAI|Disguise Self}}, the party is allowed passage without issue. | |||
* {{Dialogue option|Stand aside.|tags=Illithid|roll=Wisdom|dc=5}} | |||
* {{Dialogue option|I'm a hired sword - employer's inside. Stand aside. ''Now.''|roll=Intimidation|dc=15}} | |||
* {{Dialogue option|To offer my sword to your boss. You can be my first demonstration, if you like.|tags=Fighter|roll=Intimidation|dc=10|advantage=y}} | |||
* {{Dialogue option|Your leader summoned me.|roll=Deception|dc=15}} | |||
* {{Dialogue option|I could best all of your sentinels with my bare hands. Let me pass.|tags=Monk|roll=Intimidation|dc=15|advantage=y}} | |||
* {{Dialogue option|Glossy coat on that animal. Does she belong to the ''Nordiland worgata'' family?|roll=Nature|dc=10}} | |||
* {{Dialogue option|Glossy coat on that animal. Does she belong to the ''Nordiland worgata'' family?|tags=Ranger, Druid|roll=Nature|dc=5}} | |||
* {{Dialogue option|''Read the goblin's mind.''|tags=Detect Thoughts|roll=Intelligence|dc=9}} | |||
** {{Dialogue option|I'm a messenger - here to see Minthara.}} | |||
Bypassing the checkpoint through most of these methods rewards 140 xp and [[File:Inspiration Icon.png|24px|link=]][[Inspiration|Very Important Parasite]] for [[Charlatan|charlatans]]. If the party fail any of the checks or pick certain ones, Olak tries to goad them into rubbing worg dung on their face. | |||
* {{Dialogue option|''Grimace and do what you have to do.''}} {{Approval|Astarion|-1}} {{Approval|Lae'zel|-1}} {{Approval|Shadowheart|-1}} {{Approval|Wyll|-1}} {{Approval|Karlach|-1}} | |||
* {{Dialogue option|''Smear the dung across your face. It's not your first time.''}} {{Approval|Astarion|-1}} {{Approval|Lae'zel|-1}} {{Approval|Shadowheart|-1}} {{Approval|Wyll|-1}} {{Approval|Karlach|-1}} | |||
* {{Dialogue option|''Wink, gather the dung, and fling it at all four guards.''}} {{Approval|Astarion|+1}} {{Approval|Lae'zel|+1}} {{Approval|Wyll|+1}} {{Approval|Karlach|+1}} (Starts a fight) | |||
* {{Dialogue option|That's nature's bounty. Helps the tress grow. Eat it, or else.|tags=Barbarian|roll=Intimidation|dc=15}} | |||
* {{Dialogue option|''Scoop up the warm dung and fling it at Olak's face.''|roll=Athletics|dc=10}} (This will start a fight but leave Olak [[Blinded (Condition)|Blinded]] for {{Duration|3}}.) | |||
* {{Dialogue option|'''I said. EAT IT.'''|tags=Berserker|roll=Intimidation|dc=15|advantage=y}} | |||
* If the party refuse or try to leave, a fight is initiated. | |||
If the party approach the checkpoint from the the other side, they are spotted by Rindle, who quickly confronts them. The party can attack or try to talk their way out of combat: | |||
* {{Dialogue option|Stand down. I'll go where I please.|tags=Illithid|roll=Wisdom|dc=2}} | |||
* {{Dialogue option|Or you could let me pass and live to see nightfall.|roll=Deception|dc=10}} (if the party know about Moonrise Towers) | |||
* {{Dialogue option|I'm in a hurry. I have an important message from your boss.|roll=Deception|dc=15}} | |||
* {{Dialogue option|Remove yourself from my presence, or pay the price.|tags=Drow}} | |||
* {{Dialogue option|Move. I'm from ''Moonrise Towers.''|tags=Drow}} (if the party know about Moonrise Towers) | |||
If combat occurs, the goblins beyond the checkpoint and in the main camp are not alerted. | |||
==== Boulder trap ==== | |||
On the south rocky hill is a barricade which, if destroyed, causes a large boulder to roll across the checkpoint. It causes {{DamageText|3d6|Bludgeoning}} with a chance to hit multiple times if someone is in an unfortunate position. {{CharLink|Rindle|Tracker Rindle}} or {{CharLink|Bal|Tracker Bal}} are likely to target the boulder if none of their allies are threatened by the trap. | |||
==== War drum ==== | |||
If a fight breaks out, {{CharLink|Snurd|Sharp-Eye Snurd}} or another goblin focuses on reaching the drum, which alerts {{CharLink|Sluck|Sharp-eye Sluck}}, {{CharLink|Wasp|Devout Wasp}} and {{CharLink|Tud|Warlock Tud}} from their small camp farther west and causes them to join the fight. However, the drum does not alert the main camp. The party can destroy it with an attack or interact with it. | |||
* {{Dialogue option|''Bang the drum with an open palm.''}} (This causes all goblins at the checkpoint and beyond to become hostile.) | |||
* {{Dialogue option|''Imitate the beat of a popular goblin drinking anthem.''|tags=Bard|roll=Performance|dc=10}} (This leads to a funny scene of the player character playing the drums. While it alerts the goblins from the small camp, no fight breaks out as Olak enjoyed the music but gives a warning. Can be repeated again which causes a fight to break out.) | |||
* {{Dialogue option|''Rap out a simple rhythm.''|roll=Performance|dc=10}} (Same result as above.) | |||
* {{Dialogue option|''Tear the drumhead open.''}} (Disables the drum, making it unusable.) | |||
==== Reinforcement camp ==== | |||
{{CharLink|Sluck|Sharp-eye Sluck}}, {{CharLink|Wasp|Devout Wasp}} and {{CharLink|Tud|Warlock Tud}} hang out at this small camp farther west of the checkpoint. They are not hostile, even if the party snuck around the other goblins. The western road leads to the [[Rosymorn Monastery Trail]] (labelled as [[Mountain Pass]]), which progresses certain quests in the area, causing some to fail or be incomplete. | |||
=== Goblin camp === | |||
Across a crumbling bridge is the main section of the camp. Farther north is the entrance to the [[Shattered Sanctum]]. | |||
== | ==== Goblin tunnels ==== | ||
Scattered around the camp are tunnels (usable only by the goblins) linking the ground level areas of the camp to the upper level areas (primarily the ramparts and terrace). The goblins use these tunnels during combat to quickly move between areas. Usage of these tunnels can be prevented by placing sufficiently large items on top of them, such as barrels or boxes. | |||
{{ | ==== Centre courtyard ==== | ||
Most of the goblins are in this area, which contains scattered tables set before a crude stage where {{CharLink|Volo}} struggles to entertain the raiders through his performance, under the watchful eye of {{CharLink|Gribbo}}. Volo continues singing, randomizing his lines, until the party try to talk to him, which results in Gribbo dragging him into the Shattered Sanctum. | |||
Bards can attempt to continue Volo's song, which results in 15 XP and initiates {{Quest|Rescue Volo}}. | |||
* {{Dialogue option|''Continue rhyming.'' For a soul's not been truer than the Ragzlin named Dror...|tags=Bard|roll=Performance|dc=10}} | |||
* {{Dialogue option|I heard Ragzlin casts shadows that are 20 leagues wide!|tags=Bard|roll=Performance|dc=12}} | |||
In the south eastern corner is {{CharLink|Grat|Grat the Trader}} who sells a small yet useful selection of magic items and supplies. | |||
Talking to the other goblins reveals details about their group, information about {{CharLink|Halsin}}, and other secrets within the temple. | |||
** [[ | |||
** [[Worg Pens | [[The Dark Urge]] can eat the roast dwarf belly, earning the [[File:Inspiration Icon.png|24px|link=]][[Inspiration|Good Ol' Long Pig]] for the [[Haunted One|haunted one]]. | ||
==== Booze tub ==== | |||
Northeast of the cooking spit is a large, upside down skull at {{Coords|-95|442}} that the goblins use to store their booze. If interacted with, the party can spike it with a {{SmRarityItem|Basic Poison}}, {{SmRarityItem|Wyvern Toxin}} or {{SmRarityItem|Drow Poison}}. It is best to try this in turn based mode while [[Hiding (Condition)|Hiding]] and/or having someone [[Perform]] as a [[Distracted (Condition)|Distraction.]] If the party member interacting with the tub is noticed, they are confronted by goblins. A variety of skills checks can be passed to avoid combat: | |||
* {{Dialogue option|A lethal poison. Enough to take the lot of you down.}} (This will turn the whole camp hostile.) | |||
* {{Dialogue option|Just a drop of firewine. It'll give the brew a real kick.|roll=Deception|dc=5}} | |||
* {{Dialogue option|I'll slip a knife between your ribs if you don't piss off.|roll=Intimidation|dc=10}} | |||
* {{Dialogue option|You saw nothing, or I'll crush your eyes like grapes. Got it?|tags=Barbarian|roll=Intimidation|dc=10|advantage=y}} | |||
* {{Dialogue option|''Palm the poison vial and feign innocence.''|tags=Rogue|roll=Sleight of Hand|dc=10|advantage=y}} | |||
* {{Dialogue option|Turn around and walk away. Do not question the will of the Absolute.|tags=Illithid|roll=Intelligence|dc=2}} | |||
* {{Dialogue option|''Read their mind.''|roll=Intelligence|dc=12}} | |||
** {{Dialogue option|Don't be stupid. You can barely see straight}} | |||
If the drinks are spiked, a toast begins and the party are pushed to join. There are different ways to respond: | |||
* {{Dialogue option|''Down the beer.''}} ({{SavingThrow|CON|dc=15}} to avoid taking {{DamageText|1d6|Poison}} for {{Duration|10}}. Dwarves automatically pass) | |||
* {{Dialogue option|''Spill the beer, then pretend to drink from the empty cup.''|roll=Sleight of Hand|dc=10}} | |||
* {{Dialogue option|After you! I shouldn't drink before the host.|roll=Deception|dc=10}} | |||
* {{Dialogue option|''Show off an elaborate bartending trick.''|tags=Bard|roll=Performance|dc=10|advantage=y}} | |||
Failing any of the checks above results in another chance to avoid suspicion: | |||
* {{Dialogue option|''Drink quickly to squash their suspicions.''}} (Leading to the save as drinking above.) | |||
* {{Dialogue option|You've caught me. It's poisoned.}} (This will turn the whole camp hostile.) | |||
* {{Dialogue option|I'm simply being a good guest, that's all.|roll=Persuasion|dc=10}} | |||
* {{Dialogue option|I was checking none of you idiots had spilled anything foul in there.|roll=Deception|dc=10}} | |||
* {{Dialogue option|Aw, c'mon. I've already had a few cups... can barely see straight|roll=Performance|dc=7}} | |||
* {{Dialogue option|''Read her mind.''|roll=Intelligence|dc=12}} | |||
** {{Dialogue option|Don't be stupid. You might be able to drink all day - the Absolute needs me sober.}} | |||
If the party avoid suspicion, the goblins all drink up. {{CharLink|Mirg}}, {{CharLink|Grikka}}, {{CharLink|Sul}}, {{CharLink|Puli}}, {{CharLink|Aggy}}, {{CharLink|Gurk}} and {{CharLink|Breg}} quickly die from the poison. A few others have their health halved. Successfully poisoning the goblins earns [[File:Inspiration Icon.png|24px|link=]][[Inspiration|Now It's a Party!]] for the [[Haunted One|haunted one]] and [[File:Inspiration Icon.png|24px|link=]][[Inspiration|Spiked!]] for [[Charlatan|charlatans]]. If the player character later shares a drink with {{CharLink|Shadowheart}} during her first romance scene, a unique dialogue option referencing this event is available. | |||
After the goblins drop dead, the party gain experience as if they killed the seven goblins. The survivors swiftly accuse the party for the poisoning, forcing them to attempt a few possible skill checks to avoid combat. | |||
* {{Dialogue option|If I'd poisoned you, do you really think I'd still be here?|roll=Deception|dc=15}} | |||
* {{Dialogue option|I did, but I can slit your throat if you'd prefer a quick death.|roll=Intimidation|dc=20}} | |||
* {{Dialogue option|'''I should have ripped your arms off!'''|tags=Berserker|roll=Intimidation|dc=20|advantage=y}} | |||
* {{Dialogue option|Could've done a lot worse. '''A lot worse.'''|tags=Barbarian|roll=Intimidation|dc=20|advantage=y}} | |||
* {{Dialogue option|Consider it a privilege. I could have just gutted you.|tags=Drow|roll=Intimidation|dc=10}} | |||
* {{Dialogue option|And why would I do that? I'm a True Soul.|tags=Illithid|roll=Wisdom|dc=5}} | |||
* {{Dialogue option|''Read his/her mind.''|tags=Detect Thoughts|roll=Wisdom}} | |||
** {{Dialogue option|You poisoned yourselves. This is Elderberry Beer - goblins are allergic to it.}} | |||
If a fight is avoided, the goblins take defensive positions around camp, believing they are under attack. The booze tub is destroyed to prevent further incidents. If {{CharLink|Andrick}} and {{CharLink|Brynna}} are at the camp, they immediately turn hostile when spoken to, which can involve the entire camp depending on their position. | |||
==== Western courtyard ==== | |||
This area is dedicated to the chicken chasing game that is organized by {{CharLink|Krolla}}. She does not start any games until Volo is imprisoned after his performance. If the party have not gone to the [[Owlbear Nest]] or if the {{CharLink|Owlbear Cub}} is dead, the party play against the {{CharLink|Dishevelled Chicken}}. Otherwise, the cub takes its place after eating the poultry. Playing the game is an easy way to earn 300 [[Gold]] if the party can pass the right skill checks. The full details on how to succeed can be found [[Krolla|here]]. | |||
On the north side of this courtyard are climbable vines that lead to the upper tier of the camp. | |||
==== Eastern courtyard ==== | |||
The camp's Waypoint is on the eastern side of the camp, along with a small stage where {{CharLink|Crusher}} boasts to three other goblins. The {{SmRarityItem|Crusher's Ring|ring}} he wears on his toe can be acquired in several ways. | |||
Behind the stage is a ladder that leads up to a secluded cliffside area to the upper tier of the camp. | |||
==== Eastern cliffs ==== | |||
Following up from the eastside courtyard, a trail leads to climbable rockfaces that lead to the secluded cliffside. | |||
Beware of poison and blast mines, both requiring a passive {{Ability Check|Perception|15}} to notice. {{Ability Check|Sleight of Hand|10}} is required to disable both types of mines. Blast mines deal {{DamageText|2d6|Fire}} with a {{Saving Throw|DEX|dc=12}} to halve the damage, while poison mines deal {{DamageText|2d6|Poison}} with a {{Saving Throw|DEX|dc=11}} to halve the damage, which also leaves behind a {{AOE|Radius|m=3|ft=10}} {{SAI|Poison Cloud}} for {{Duration|3}}. The party can use {{DamageType|Force}} to bypass the [[Sturdy (Condition)|Sturdy]] condition of the mines. At the end of this path, there is a locked chest containing the {{SmRarityItem|Glowing Shield}}. | |||
== Waypoints == | |||
This location contains the following {{SmIconLink|Waypoint Map Icon.png|Waypoints}}: | |||
* {{WpCo|Goblin Camp|-75|445}} | |||
== Connected Locations == | |||
* {{Loc|Shattered Sanctum}} | |||
** {{SubLoc|Defiled Temple}} | |||
** {{SubLoc|Worg Pens}} | |||
== Characters == | == Characters == | ||
The NPCs in this location may vary based on | The NPCs in this location may vary based on storyline choices and progress. | ||
=== Notable | === Notable characters === | ||
* | {{div_col}} | ||
* | * {{MdCharLink|Andrick}} | ||
* | * {{MdCharLink|Brynna}} | ||
* | * {{MdCharLink|Crusher}} | ||
* | * {{MdCharLink|Dishevelled Chicken}} | ||
* | * {{MdCharLink|Gribbo}} | ||
* | * {{MdCharLink|Krolla}} | ||
* {{MdCharLink|Owlbear Cub}} | |||
* {{MdCharLink|Sazza}} | |||
* {{MdCharLink|Volo}} | |||
{{div_col_end}} | |||
=== Merchants === | === Merchants === | ||
* | * {{MdCharLink|Grat|Grat the Trader}} | ||
===Other | === Other characters === | ||
{{div_col|colwidth=20em}} | |||
* {{MdCharLink|Eight}} | |||
* {{MdCharLink|Five}} | |||
* {{MdCharLink|Four}} | |||
* {{MdCharLink|Bao'ek'nuk}} | |||
* {{MdCharLink|Culk|Booyahg Culk}} | |||
* {{MdCharLink|Gnat|Booyahg Gnat}} | |||
* {{MdCharLink|Piddle|Booyahg Piddle}} | |||
* {{MdCharLink|Gurd|Brawler Gurd}} | |||
* {{MdCharLink|Rancer|Brawler Rancer}} | |||
* {{MdCharLink|Rot|Brawler Rot}} | |||
* {{MdCharLink|Tiny (Goblin)|Brawler Tiny}} | |||
* {{MdCharLink|Cry|Devout Cry}} | |||
* {{MdCharLink|Mezzka|Devout Mezzka}} | |||
* {{MdCharLink|Wasp|Devout Wasp}} | |||
* {{MdCharLink|Gurgon|Guard Gurgon}} | |||
* {{MdCharLink|Klaw|icon=Portrait Worg.png}} | |||
* {{MdCharLink|Olak|Sentinel Olak}} | |||
* {{MdCharLink|Aggy|Sharp-eye Aggy}} | |||
* {{MdCharLink|Breg|Sharp-eye Breg}} | |||
* {{MdCharLink|Crub|Sharp-eye Crub}} | |||
* {{MdCharLink|Mirg|Sharp-eye Mirg}} | |||
* {{MdCharLink|Raagg|Sharp-eye Raagg}} | |||
* {{MdCharLink|Roo|Sharp-eye Roo}} | |||
* {{MdCharLink|Sluck|Sharp-eye Sluck}} | |||
* {{MdCharLink|Snurd|Sharp-eye Snurd}} | |||
* {{MdCharLink|Zami|Sharp-eye Zami}} | |||
* {{MdCharLink|Stimk}} | |||
* {{MdCharLink|Small Klaw|icon=Portrait Worg.png}} | |||
* {{MdCharLink|Teghun}} | |||
* {{MdCharLink|Bal|Tracker Bal}} | |||
* {{MdCharLink|Dullwill|Tracker Dullwill}} | |||
* {{MdCharLink|Grikka|Tracker Grikka}} | |||
* {{MdCharLink|Kirz|Tracker Kirz}} | |||
* {{MdCharLink|Klagga|Tracker Klagga}} | |||
* {{MdCharLink|Nik-Nuk|Tracker Nik-Nuk}} | |||
* {{MdCharLink|Puli|Tracker Puli}} | |||
* {{MdCharLink|Rindle|Tracker Rindle}} | |||
* {{MdCharLink|Tak|Tracker Tak}} | |||
* {{MdCharLink|Bolt|Warlock Bolt}} | |||
* {{MdCharLink|Tud|Warlock Tud}} | |||
* {{MdCharLink|Gurk|Warlock Gurk}} | |||
* {{MdCharLink|Bez|Warrior Bez}} | |||
* {{MdCharLink|Clack|Warrior Clack}} | |||
* {{MdCharLink|Druk|Warrior Druk}} | |||
* {{MdCharLink|Huk|Warrior Huk}} | |||
* {{MdCharLink|Plagg|Warrior Plagg}} | |||
* {{MdCharLink|Puce|Warrior Puce}} | |||
* {{MdCharLink|Sul|Warrior Sul}} | |||
{{div_col_end}} | |||
== | == Notable items == | ||
Notable items obtained in this location, whether looted, purchased, or obtained as a quest reward: | Notable items obtained in this location, whether looted, purchased, or obtained as a quest reward: | ||
=== Sold by | === Sold by Grat the Trader === | ||
{{Div_col}} | |||
*{{ | *{{MdRarityItem|Boots of Aid and Comfort}} | ||
*{{ | *{{MdRarityItem|Doom Hammer}} | ||
*{{ | *{{MdRarityItem|Greatclub +1}} | ||
*{{MdRarityItem|Greatsword +1}} | |||
*{{ | *{{MdRarityItem|Gloves of Archery}} | ||
*{{ | *{{MdRarityItem|Hide Armour +2}} | ||
*{{ | *{{MdRarityItem|Longbow +1}} | ||
*{{ | *{{MdRarityItem|Returning Pike}} | ||
*{{ | *{{MdRarityItem|Swiresy Shoes}} | ||
*{{ | *{{MdRarityItem|The Whispering Promise}} | ||
*{{ | *{{MdRarityItem|War Pick +1}} | ||
{{Div_col_end}} | |||
=== Looted === | === Looted === | ||
*{{ | *{{MdRarityItem|Crusher's Ring}} looted from [[Novice Crusher]] or stolen from him through an interaction | ||
*{{ | *{{MdRarityItem|Glowing Shield}} in a locked chest at {{Coords|-57|467}} | ||
== Hidden | == Hidden treasures == | ||
* Buried chest on the ledge south of the chicken chasing arena, containing some scrolls at {{Coords|-131|425}} | |||
* Buried chest on the northeastern ledge, overlooking the sleeping [[Bugbear (Race)|bugbears]] on the upper level, requiring a {{SkillCheck|Survival|10}} to locate at {{Coords|-77|466}} | |||
* Buried chest on the east road leading to the [[Rosymorn Monastery Trail]], requiring a {{SkillCheck|Survival|15}} to locate at {{Coords|-154|329}} | |||
* Buried chest on a ledge below Rancer, requiring a {{SkillCheck|Survival|15}} to locate at {{Coords|-76|402}} | |||
* Heavy chest in the southeastern tower of the camp entrance, which can be reached with [[Jump]] and contains a {{SmRarityItem|Smokepowder Bomb}} at {{Coords|-99|416}} | |||
* Locked chest along the cliffs in the northeastern corner, requiring a {{SkillCheck|Sleight of Hand|10}} and guarded by blast and poison mines. Contains the {{SmRarityItem|Glowing Shield}} {{Coords|-57|467}} | |||
* | == Related quests == | ||
* | *{{Quest|Find the Nightsong}} | ||
* | *{{Quest|Remove the Parasite}} | ||
* | **{{SubQuest|Ask the Goblin Priestess for Help}} | ||
{{ | *{{Quest|Rescue Volo}} | ||
*{{Quest|Save the Goblin Sazza}} | |||
*{{Quest|Save the Refugees}} | |||
**{{SubQuest|Defeat the Goblins}} | |||
**{{SubQuest|Save the First Druid}} | |||
*{{Quest|The Blade of Frontiers}} | |||
== | == Gallery == | ||
<gallery heights="250"> | |||
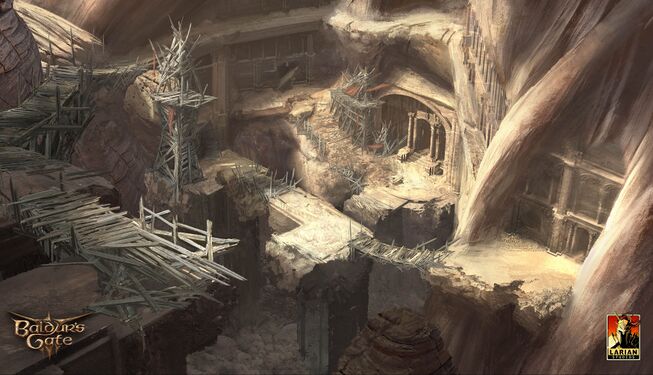
Dan-iorgulescu-goblin-camp-entrance-2.jpg|Concept art by Dan Iorgulescu | |||
</gallery> | |||
{{Goblin Camp}} | |||
[[Category:Locations]] | [[Category:Locations]] | ||
[[Category:Act One Locations]] | [[Category:Act One Locations]] | ||
Latest revision as of 03:36, 16 February 2025

| Wilderness | ||||
| Shattered Sanctum | ||||
| ↑ | ||||
| Rosymorn Monastery Trail | ← | Goblin Camp | → | Blighted Village |
| ↓ | ||||
| Sunlit Wetlands | ||||

“Hear Volo! I cry far and wide for great glory!Mountains' great mortals, all ginders to quake. Laugh if you dare! Recoil, as you must! The True Souls are coming, their louders awake. His name is Dror Ragzlin, his voice Absolute. Dror Ragzlin's best make is a blade in the quarry! His troops will disarm you and groar you the truth! Be you beguiled or be you beheaded - - goblinkind will attease and frelk you, areaded!
A new age is dawning, with goblins atrust!„
Overview[edit | edit source]

Access[edit | edit source]
The main entrance of the Goblin Camp can be reached after crossing the wooden bridge at X: -50 Y: 369 in the Forest. Alternate entries are possible.
- Leaping off the road beside a Hunter's Stash in the Forest south of the wooden bridge, then crossing the fallen log at X: -28 Y: 315. Feather Fall is recommended. Reaching the entrance of the trapped tunnels rewards 15 xp.
- Leaping off the cliff west of the windmill, behind the broken shrine of Selûne in the Blighted Village, then crossing the stone bridge at X: -53 Y: 455. Feather Fall is required. This rewards 15 xp.
Forest road checkpoint[edit | edit source]
To reach the camp, the guard post along the main road must be bypassed. A passive ![]() DC 10 Intelligence check reveals this is a goblin outpost and highlights the war drum.
DC 10 Intelligence check reveals this is a goblin outpost and highlights the war drum.
Trapped tunnel[edit | edit source]
To bypass the check point, or if entering via the fallen log bridge, passing a passive ![]() DC 17 Perception check reveals a tunnel to the south rigged with blast mines. The mines deal 2d6
DC 17 Perception check reveals a tunnel to the south rigged with blast mines. The mines deal 2d6![]() Fire with a DC 12
Fire with a DC 12 ![]() Dexterity saving throw to halve the damage. The mines can be disabled with a
Dexterity saving throw to halve the damage. The mines can be disabled with a ![]() DC 10 Sleight of Hand check. It is also possible to travel around the checkpoint by jumping over a small bottomless pit.
DC 10 Sleight of Hand check. It is also possible to travel around the checkpoint by jumping over a small bottomless pit.
Check point interactions[edit | edit source]
When approaching the guard post, Sentinel Olak is quick to question and threaten the party. There are a few ways to bypass him without fighting:
- Sazza vouches for the party as part of the
 quest.
 - As a drow, or appearing as a drow using
 , the party is allowed passage without issue.
 - [ILLITHID] [WISDOM] Stand aside. (DC 5)
- [INTIMIDATION] I'm a hired sword - employer's inside. Stand aside. Now. (DC 15)
- [FIGHTER] [INTIMIDATION] To offer my sword to your boss. You can be my first demonstration, if you like. (DC 10
 )
) - [DECEPTION] Your leader summoned me. (DC 15)
- [MONK] [INTIMIDATION] I could best all of your sentinels with my bare hands. Let me pass. (DC 15 )
- [NATURE] Glossy coat on that animal. Does she belong to the Nordiland worgata family? (DC 10)
- [RANGER] [DRUID] [NATURE] Glossy coat on that animal. Does she belong to the Nordiland worgata family? (DC 5)
- [DETECT THOUGHTS] [INTELLIGENCE] Read the goblin's mind. (DC 9)
- I'm a messenger - here to see Minthara.
Bypassing the checkpoint through most of these methods rewards 140 xp and ![]() Very Important Parasite for charlatans. If the party fail any of the checks or pick certain ones, Olak tries to goad them into rubbing worg dung on their face.
Very Important Parasite for charlatans. If the party fail any of the checks or pick certain ones, Olak tries to goad them into rubbing worg dung on their face.
- Grimace and do what you have to do.
 -1
-1  -1
-1  -1
-1  -1
-1  -1
-1 - Smear the dung across your face. It's not your first time. -1 -1 -1 -1 -1
- Wink, gather the dung, and fling it at all four guards. +1 +1 +1 +1 (Starts a fight)
- [BARBARIAN] [INTIMIDATION] That's nature's bounty. Helps the tress grow. Eat it, or else. (DC 15)
- [ATHLETICS] Scoop up the warm dung and fling it at Olak's face. (DC 10) (This will start a fight but leave Olak Blinded for
 Duration: 3 turns.)
 - [BERSERKER] [INTIMIDATION] I said. EAT IT. (DC 15 )
- If the party refuse or try to leave, a fight is initiated.
If the party approach the checkpoint from the the other side, they are spotted by Rindle, who quickly confronts them. The party can attack or try to talk their way out of combat:
- [ILLITHID] [WISDOM] Stand down. I'll go where I please. (DC 2)
- [DECEPTION] Or you could let me pass and live to see nightfall. (DC 10) (if the party know about Moonrise Towers)
- [DECEPTION] I'm in a hurry. I have an important message from your boss. (DC 15)
- [DROW] Remove yourself from my presence, or pay the price.
- [DROW] Move. I'm from Moonrise Towers. (if the party know about Moonrise Towers)
If combat occurs, the goblins beyond the checkpoint and in the main camp are not alerted.
Boulder trap[edit | edit source]
On the south rocky hill is a barricade which, if destroyed, causes a large boulder to roll across the checkpoint. It causes 3d6![]() Bludgeoning with a chance to hit multiple times if someone is in an unfortunate position. Tracker Rindle or Tracker Bal are likely to target the boulder if none of their allies are threatened by the trap.
Bludgeoning with a chance to hit multiple times if someone is in an unfortunate position. Tracker Rindle or Tracker Bal are likely to target the boulder if none of their allies are threatened by the trap.
War drum[edit | edit source]
If a fight breaks out, Sharp-Eye Snurd or another goblin focuses on reaching the drum, which alerts Sharp-eye Sluck, Devout Wasp and Warlock Tud from their small camp farther west and causes them to join the fight. However, the drum does not alert the main camp. The party can destroy it with an attack or interact with it.
- Bang the drum with an open palm. (This causes all goblins at the checkpoint and beyond to become hostile.)
- [BARD] [PERFORMANCE] Imitate the beat of a popular goblin drinking anthem. (DC 10) (This leads to a funny scene of the player character playing the drums. While it alerts the goblins from the small camp, no fight breaks out as Olak enjoyed the music but gives a warning. Can be repeated again which causes a fight to break out.)
- [PERFORMANCE] Rap out a simple rhythm. (DC 10) (Same result as above.)
- Tear the drumhead open. (Disables the drum, making it unusable.)
Reinforcement camp[edit | edit source]
Sharp-eye Sluck, Devout Wasp and Warlock Tud hang out at this small camp farther west of the checkpoint. They are not hostile, even if the party snuck around the other goblins. The western road leads to the Rosymorn Monastery Trail (labelled as Mountain Pass), which progresses certain quests in the area, causing some to fail or be incomplete.
Goblin camp[edit | edit source]
Across a crumbling bridge is the main section of the camp. Farther north is the entrance to the Shattered Sanctum.
Goblin tunnels[edit | edit source]
Scattered around the camp are tunnels (usable only by the goblins) linking the ground level areas of the camp to the upper level areas (primarily the ramparts and terrace). The goblins use these tunnels during combat to quickly move between areas. Usage of these tunnels can be prevented by placing sufficiently large items on top of them, such as barrels or boxes.
Centre courtyard[edit | edit source]
Most of the goblins are in this area, which contains scattered tables set before a crude stage where Volo struggles to entertain the raiders through his performance, under the watchful eye of Gribbo. Volo continues singing, randomizing his lines, until the party try to talk to him, which results in Gribbo dragging him into the Shattered Sanctum.
Bards can attempt to continue Volo's song, which results in 15 XP and initiates ![]() .
.
- [BARD] [PERFORMANCE] Continue rhyming. For a soul's not been truer than the Ragzlin named Dror... (DC 10)
- [BARD] [PERFORMANCE] I heard Ragzlin casts shadows that are 20 leagues wide! (DC 12)
In the south eastern corner is Grat the Trader who sells a small yet useful selection of magic items and supplies.
Talking to the other goblins reveals details about their group, information about Halsin, and other secrets within the temple.
The Dark Urge can eat the roast dwarf belly, earning the ![]() Good Ol' Long Pig for the haunted one.
Good Ol' Long Pig for the haunted one.
Booze tub[edit | edit source]
Northeast of the cooking spit is a large, upside down skull at X: -95 Y: 442 that the goblins use to store their booze. If interacted with, the party can spike it with a ![]() Basic Poison,
Basic Poison, ![]() Wyvern Toxin or
Wyvern Toxin or ![]() Drow Poison. It is best to try this in turn based mode while Hiding and/or having someone Perform as a Distraction. If the party member interacting with the tub is noticed, they are confronted by goblins. A variety of skills checks can be passed to avoid combat:
Drow Poison. It is best to try this in turn based mode while Hiding and/or having someone Perform as a Distraction. If the party member interacting with the tub is noticed, they are confronted by goblins. A variety of skills checks can be passed to avoid combat:
- A lethal poison. Enough to take the lot of you down. (This will turn the whole camp hostile.)
- [DECEPTION] Just a drop of firewine. It'll give the brew a real kick. (DC 5)
- [INTIMIDATION] I'll slip a knife between your ribs if you don't piss off. (DC 10)
- [BARBARIAN] [INTIMIDATION] You saw nothing, or I'll crush your eyes like grapes. Got it? (DC 10 )
- [ROGUE] [SLEIGHT OF HAND] Palm the poison vial and feign innocence. (DC 10 )
- [ILLITHID] [INTELLIGENCE] Turn around and walk away. Do not question the will of the Absolute. (DC 2)
- [INTELLIGENCE] Read their mind. (DC 12)
- Don't be stupid. You can barely see straight
If the drinks are spiked, a toast begins and the party are pushed to join. There are different ways to respond:
- Down the beer. (DC 15
 Constitution saving throw to avoid taking 1d6
 Poison for Duration: 10 turns. Dwarves automatically pass)
 - [SLEIGHT OF HAND] Spill the beer, then pretend to drink from the empty cup. (DC 10)
- [DECEPTION] After you! I shouldn't drink before the host. (DC 10)
- [BARD] [PERFORMANCE] Show off an elaborate bartending trick. (DC 10 )
Failing any of the checks above results in another chance to avoid suspicion:
- Drink quickly to squash their suspicions. (Leading to the save as drinking above.)
- You've caught me. It's poisoned. (This will turn the whole camp hostile.)
- [PERSUASION] I'm simply being a good guest, that's all. (DC 10)
- [DECEPTION] I was checking none of you idiots had spilled anything foul in there. (DC 10)
- [PERFORMANCE] Aw, c'mon. I've already had a few cups... can barely see straight (DC 7)
- [INTELLIGENCE] Read her mind. (DC 12)
- Don't be stupid. You might be able to drink all day - the Absolute needs me sober.
If the party avoid suspicion, the goblins all drink up. Mirg, Grikka, Sul, Puli, Aggy, Gurk and Breg quickly die from the poison. A few others have their health halved. Successfully poisoning the goblins earns ![]() Now It's a Party! for the haunted one and
Now It's a Party! for the haunted one and ![]() Spiked! for charlatans. If the player character later shares a drink with Shadowheart during her first romance scene, a unique dialogue option referencing this event is available.
Spiked! for charlatans. If the player character later shares a drink with Shadowheart during her first romance scene, a unique dialogue option referencing this event is available.
After the goblins drop dead, the party gain experience as if they killed the seven goblins. The survivors swiftly accuse the party for the poisoning, forcing them to attempt a few possible skill checks to avoid combat.
- [DECEPTION] If I'd poisoned you, do you really think I'd still be here? (DC 15)
- [INTIMIDATION] I did, but I can slit your throat if you'd prefer a quick death. (DC 20)
- [BERSERKER] [INTIMIDATION] I should have ripped your arms off! (DC 20 )
- [BARBARIAN] [INTIMIDATION] Could've done a lot worse. A lot worse. (DC 20 )
- [DROW] [INTIMIDATION] Consider it a privilege. I could have just gutted you. (DC 10)
- [ILLITHID] [WISDOM] And why would I do that? I'm a True Soul. (DC 5)
- [DETECT THOUGHTS] [WISDOM] Read his/her mind.
- You poisoned yourselves. This is Elderberry Beer - goblins are allergic to it.
If a fight is avoided, the goblins take defensive positions around camp, believing they are under attack. The booze tub is destroyed to prevent further incidents. If Andrick and Brynna are at the camp, they immediately turn hostile when spoken to, which can involve the entire camp depending on their position.
Western courtyard[edit | edit source]
This area is dedicated to the chicken chasing game that is organized by Krolla. She does not start any games until Volo is imprisoned after his performance. If the party have not gone to the Owlbear Nest or if the Owlbear Cub is dead, the party play against the Dishevelled Chicken. Otherwise, the cub takes its place after eating the poultry. Playing the game is an easy way to earn 300 Gold if the party can pass the right skill checks. The full details on how to succeed can be found here.
On the north side of this courtyard are climbable vines that lead to the upper tier of the camp.
Eastern courtyard[edit | edit source]
The camp's Waypoint is on the eastern side of the camp, along with a small stage where Crusher boasts to three other goblins. The ![]() ring he wears on his toe can be acquired in several ways.
ring he wears on his toe can be acquired in several ways.
Behind the stage is a ladder that leads up to a secluded cliffside area to the upper tier of the camp.
Eastern cliffs[edit | edit source]
Following up from the eastside courtyard, a trail leads to climbable rockfaces that lead to the secluded cliffside.
Beware of poison and blast mines, both requiring a passive ![]() DC 15 Perception check to notice.
DC 15 Perception check to notice. ![]() DC 10 Sleight of Hand check is required to disable both types of mines. Blast mines deal 2d6
DC 10 Sleight of Hand check is required to disable both types of mines. Blast mines deal 2d6![]() Fire with a DC 12
Fire with a DC 12 ![]() Dexterity saving throw to halve the damage, while poison mines deal 2d6
Dexterity saving throw to halve the damage, while poison mines deal 2d6![]() Poison with a DC 11
Poison with a DC 11 ![]() Dexterity saving throw to halve the damage, which also leaves behind a
Dexterity saving throw to halve the damage, which also leaves behind a ![]() AoE: 3 m / 10 ft (Radius)
AoE: 3 m / 10 ft (Radius) ![]() for
for ![]() Duration: 3 turns. The party can use
Duration: 3 turns. The party can use ![]() Force to bypass the Sturdy condition of the mines. At the end of this path, there is a locked chest containing the
Force to bypass the Sturdy condition of the mines. At the end of this path, there is a locked chest containing the ![]() Glowing Shield.
Glowing Shield.
Waypoints[edit | edit source]
This location contains the following ![]() :
:
 Goblin Camp X: -75 Y: 445
Connected Locations[edit | edit source]
Characters[edit | edit source]
The NPCs in this location may vary based on storyline choices and progress.
Notable characters[edit | edit source]
Merchants[edit | edit source]
Other characters[edit | edit source]
- Eight
- Five
- Four
- Bao'ek'nuk
- Booyahg Culk
- Booyahg Gnat
- Booyahg Piddle
- Brawler Gurd
- Brawler Rancer
- Brawler Rot
- Brawler Tiny
- Devout Cry
- Devout Mezzka
- Devout Wasp
- Guard Gurgon
- Klaw
- Sentinel Olak
- Sharp-eye Aggy
- Sharp-eye Breg
- Sharp-eye Crub
- Sharp-eye Mirg
- Sharp-eye Raagg
- Sharp-eye Roo
- Sharp-eye Sluck
- Sharp-eye Snurd
- Sharp-eye Zami
- Stimk
- Small Klaw
- Teghun
- Tracker Bal
- Tracker Dullwill
- Tracker Grikka
- Tracker Kirz
- Tracker Klagga
- Tracker Nik-Nuk
- Tracker Puli
- Tracker Rindle
- Tracker Tak
- Warlock Bolt
- Warlock Tud
- Warlock Gurk
- Warrior Bez
- Warrior Clack
- Warrior Druk
- Warrior Huk
- Warrior Plagg
- Warrior Puce
- Warrior Sul
Notable items[edit | edit source]
Notable items obtained in this location, whether looted, purchased, or obtained as a quest reward:
Sold by Grat the Trader[edit | edit source]
Looted[edit | edit source]
 Crusher's Ring looted from Novice Crusher or stolen from him through an interaction
 Glowing Shield in a locked chest at X: -57 Y: 467
Hidden treasures[edit | edit source]
- Buried chest on the ledge south of the chicken chasing arena, containing some scrolls at X: -131 Y: 425
- Buried chest on the northeastern ledge, overlooking the sleeping bugbears on the upper level, requiring a
 DC 10 Survival check to locate at X: -77 Y: 466
 - Buried chest on the east road leading to the Rosymorn Monastery Trail, requiring a DC 15 Survival check to locate at X: -154 Y: 329
- Buried chest on a ledge below Rancer, requiring a DC 15 Survival check to locate at X: -76 Y: 402
- Heavy chest in the southeastern tower of the camp entrance, which can be reached with Jump and contains a
 Smokepowder Bomb at X: -99 Y: 416
 - Locked chest along the cliffs in the northeastern corner, requiring a DC 10 Sleight of Hand check and guarded by blast and poison mines. Contains the
 Glowing Shield X: -57 Y: 467
Related quests[edit | edit source]
Gallery[edit | edit source]
Concept art by Dan Iorgulescu
