| This page is a modding page, and follows its own rules and standards separate from the rest of the wiki. |
Head Troubleshooting
This page is for a quick reference to issues you might run into when making your head mods.
Anything from Heterochromia not working, to wrinkles or your head disappearing when you zoom out.
Apply Transformations/Ears
When importing the head meshes we want to work on in blender remember to apply transformations. This will auto set the ears to the correct rotation (they show on the floor by default). If you already have your mesh ready and edited in blender you can still do this before exporting your meshes again.
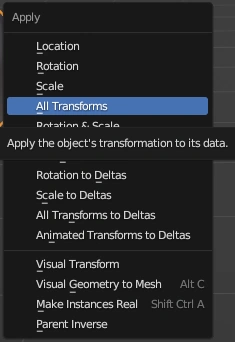
The default Blender way to do this is having your mesh selected and pressing Ctrl + A and then All Transforms
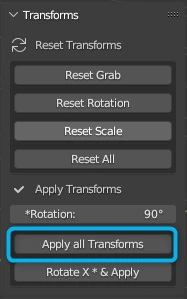
Alternatively use the Plugin by Padme4000 from here called Transforms
Ears missing/on the floor in Game
This is either to do with Apply Transforms not being applied (see above) or weights not being added to your ears. If transforms only please follow the above.
To check if your ears have weights and how to add them
With your ear mesh selected go to the Data Tab (Green triangle that has a tiny square on each point) go to Vertex Groups which should be the one at the very top.
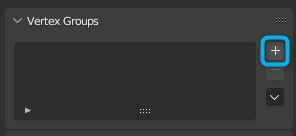
If there is nothing in there press the + to the right
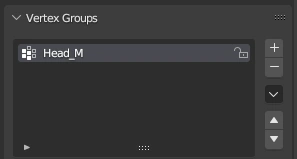
It will create a group called "Group" double click this name and change it to Head_M
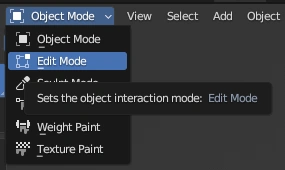
Now with your ears still selected go into Edit Mode either via pressing Tab while your mouse is in the viewport part of Blender or going to the drop down menu near the top left and switching to Edit Mode there.
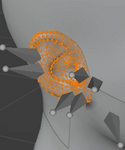
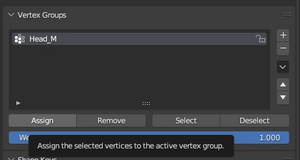
Once in Edit Mode press A to select all the vertices then on the right side where we created our Vertex Group click the Assign Button
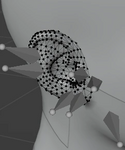 Press A to select all >
  Assign Vertices to our Group >
If you want to watch a part of a video for applying the weights watch this video by Padme4000 here
- Timestamped for exact part of Video, if you go back a little it shows how to use Sculpt mode to change the shape.
You can now go out of Edit Mode and Export your Mesh
Head Disappearing
If your head is disappearing when you zoom out, you are in luck this is a quick fix.
In blender go to the Object tab (orange square) and scroll down to the BG3 Settings and change the value in LOD Distance to 0. If it already says 0 change it to another value and then back to 0 before exporting.
Alternatively you can use the Plugin by Padme4000 from here called Create LODs - BG3 Edition
And select your meshes then click the Button called "Change to LOD 0 - BG3"
Heterochromia
Is Heterochromia not working for your custom/edited head? Thankfully this is a quick and easy fix.
So for this you do need to go back into blender.
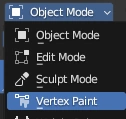
Select your eye mesh in blender and go to Vertex Paint mode.
In the Data Tab (Green triangle that has a tiny square on each point) go to Color Attributes if you don't have anything in there click + then select Face Corner and Byte Color
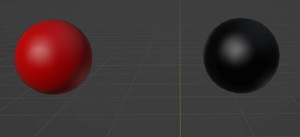
You want to paint the eye on the Left fully red (#FF0000) and keep the right one black.
Now after exporting your mesh again Heterochromia should be working
Wrinkles
So are you noticing that your characters wrinkles/expressions are more extreme than normal?
You want to edit these sections in your Heads Merged MaterialBank: _WrinkleWeightsR, _WrinkleWeightsG, _WrinkleWeightsB and _WrinkleWeightsA
						<node id="VectorParameters">
							<attribute id="BaseValue" type="fvec4" value="0 0 0 0" />
							<attribute id="Enabled" type="bool" value="False" />
							<attribute id="ExportAsPreset" type="bool" value="False" />
							<attribute id="GroupName" type="FixedString" value="" />
							<attribute id="IsColor" type="bool" value="False" />
							<attribute id="ParameterName" type="FixedString" value="_WrinkleWeightsR" />
							<attribute id="Value" type="fvec4" value="0 0 0 0" />
						</node>
						<node id="VectorParameters">
							<attribute id="BaseValue" type="fvec4" value="0 0 0 0" />
							<attribute id="Enabled" type="bool" value="False" />
							<attribute id="ExportAsPreset" type="bool" value="False" />
							<attribute id="GroupName" type="FixedString" value="" />
							<attribute id="IsColor" type="bool" value="False" />
							<attribute id="ParameterName" type="FixedString" value="_WrinkleWeightsG" />
							<attribute id="Value" type="fvec4" value="0 0 0 0" />
						</node>
						<node id="VectorParameters">
							<attribute id="BaseValue" type="fvec4" value="0 0 0 0" />
							<attribute id="Enabled" type="bool" value="False" />
							<attribute id="ExportAsPreset" type="bool" value="False" />
							<attribute id="GroupName" type="FixedString" value="" />
							<attribute id="IsColor" type="bool" value="False" />
							<attribute id="ParameterName" type="FixedString" value="_WrinkleWeightsB" />
							<attribute id="Value" type="fvec4" value="0 0 0 0" />
						</node>
						<node id="VectorParameters">
							<attribute id="BaseValue" type="fvec4" value="0 0 0 0" />
							<attribute id="Enabled" type="bool" value="False" />
							<attribute id="ExportAsPreset" type="bool" value="False" />
							<attribute id="GroupName" type="FixedString" value="" />
							<attribute id="IsColor" type="bool" value="False" />
							<attribute id="ParameterName" type="FixedString" value="_WrinkleWeightsA" />
							<attribute id="Value" type="fvec4" value="0 0 0 0" />
						</node>
For these turn <attribute id="Enabled" type="bool" value="False" /> to <attribute id="Enabled" type="bool" value="True" /> on each of these sections. It will set them all to 0 which I suggest testing first in game as you can still get wrinkles with these values. If you get 0 wrinkles and want some gradually increase the "Value" by 0.1. Best not to touch the "BaseValue" as far as I have tested.
For example:
						<node id="VectorParameters">
							<attribute id="BaseValue" type="fvec4" value="0 0 0 0" />
							<attribute id="Enabled" type="bool" value="False" />
							<attribute id="ExportAsPreset" type="bool" value="False" />
							<attribute id="GroupName" type="FixedString" value="" />
							<attribute id="IsColor" type="bool" value="False" />
							<attribute id="ParameterName" type="FixedString" value="_WrinkleWeightsA" />
							<attribute id="Value" type="fvec4" value="0.1 0.1 0.1 0.1" />
						</node>

